This something I have been seeing everywhere for quite some time now. Whether it was my mom sending me things on Pinterest or things popping up on feeds due to my regularity posting similar items, it's been a common flavor these past few months and it's also been something I have no issue experimenting with. About a month ago I came across a recipe for Chocolate Stout Pie and thought this would be great and Ricky would love it because I would be incorporating his favorite beer! I was wrong. While it was great and I loved it, Ricky did not. He said the flavor was too rich (he apparently hates dark chocolate... I didn't think it was dark at all!) and the whipped cream tasted too much like alcohol; I made a Bailey's Irish Whipped Cream to put on top which I thought was great. We ended up giving the pie to friends who enjoyed it and only gave compliments.
Alas here I am, with the dreams of Irish Car Bomb Cupcakes on a day none other than St. Patrick's Day. How fitting. I know exactly how I want my cupcakes to be: Guinness Draught (not Stout, we're going for a theme here) chocolate cake, cored with Jameson Irish Whiskey ganache, and topped with a Bailey's Irish Cream Cheese frosting. I gathered a few recipes found on various blogs via Pinterest and took from them what I liked.
Guinness Draught Cake
1 C. Guinness Draught
1 C. unsalted butter
3/4 C. unsweetened cocoa powder
2 C. all-purpose flour
2 C. sugar
1-1/2 TSP. baking soda
3/4 TSP. salt
2 large eggs
2/3 C. sour cream
Preheat oven to 350°F. Line cupcake pans with liners. Set aside.
Bring beer and butter to a simmer in a heavy saucepan over medium heat. Add cocoa powder and whisk until mixture is smooth. Cool slightly.
Whisk flour, sugar, baking soda, and salt in large bowl to blend. In a large bowl beat the eggs and sour cream until combined. Add the chocolate mixture to sour cream mixture and beat just to combine. Add the flour mixture and beat briefly on low speed. Using a rubber spatula, fold batter until completely combined. Divide batter among cupcake liners, filling them half of the way. Bake for about 20 minutes or until toothpick comes out clean. Let cool in the pans for 5 minutes, then transfer to racks to cool completely.
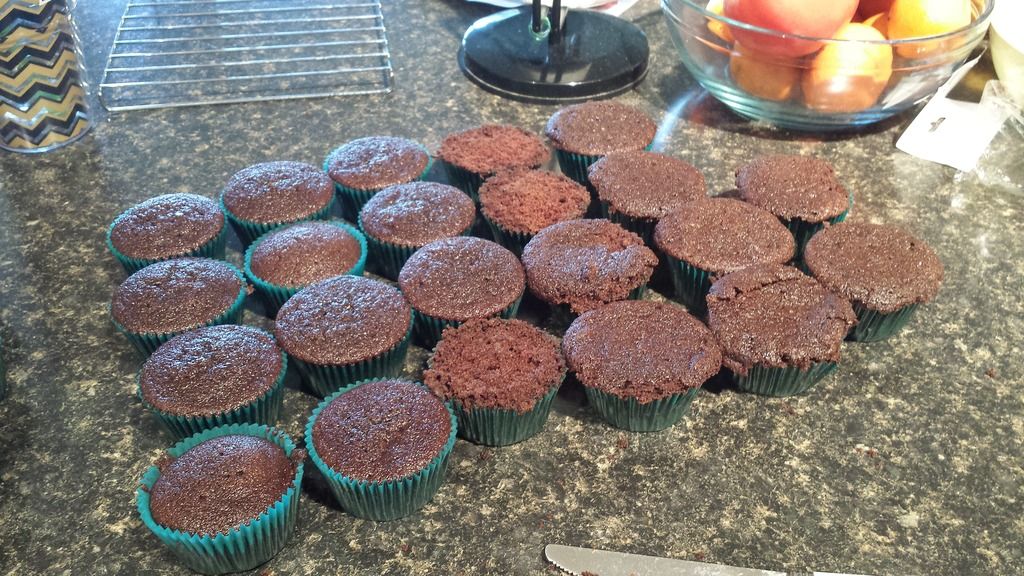
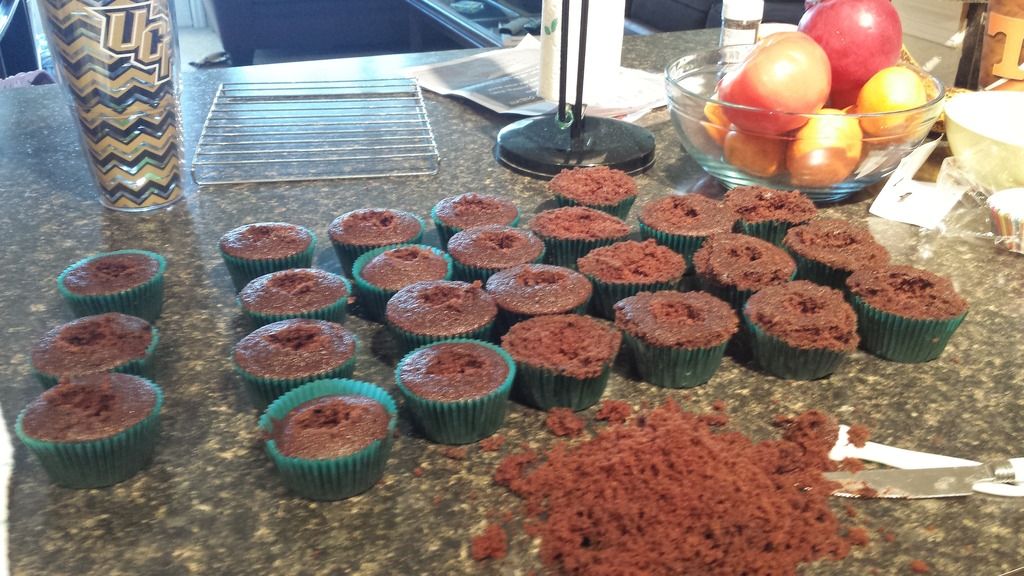
I modified the original instructions slightly. The original recipe called for you to fill the liners 2/3 of the way, but after doing this I found that the cupcakes overflowed making them "ugly," so I resulted in filling the rest half way. The other thing I modified was the baking time. After the suggested 17 minutes the cakes were still a little wet in the center so I added on the three minutes and it worked great. One very important step here though is that you leave the cupcakes in the pan for at least five minutes. I didn't do this with the first batch, I was too anxious. When I was trimming and coring them I regretted it. Not allowing for them to cool before handling them made them crumbly and mushy. Below are pictures of the cupcakes after they've baked and had been cored. The ones on the left are the ones I allowed to cool and filled half-way. The ones on the right are the first batch that I didn't allow to cool and filled too much.


To core the cupcakes I used a knife to cut a hole and carefully scoop out the inside. It wasn't ideal but it did the job.
Jameson Ganache
4 oz. semi-sweet chocolate finely chopped
2 to 3 oz. milk chocolate finely chopped
3 TBSP. unsalted butter
2/3 C. heavy cream
3 TBSP. powered sugar
3 TBSP. Jameson Irish Whiskey
Heat the cream in a saucepan, not to boiling but long enough to make it hot. Place the chopped chocolates in a bowl along with the butter. Add the hot cream to the butter and chocolate and whisk together until smooth. Add the powered sugar and combine. Add the whiskey and stir to combine. Set aside to let cool. Mixture should firm up after 15 minutes.
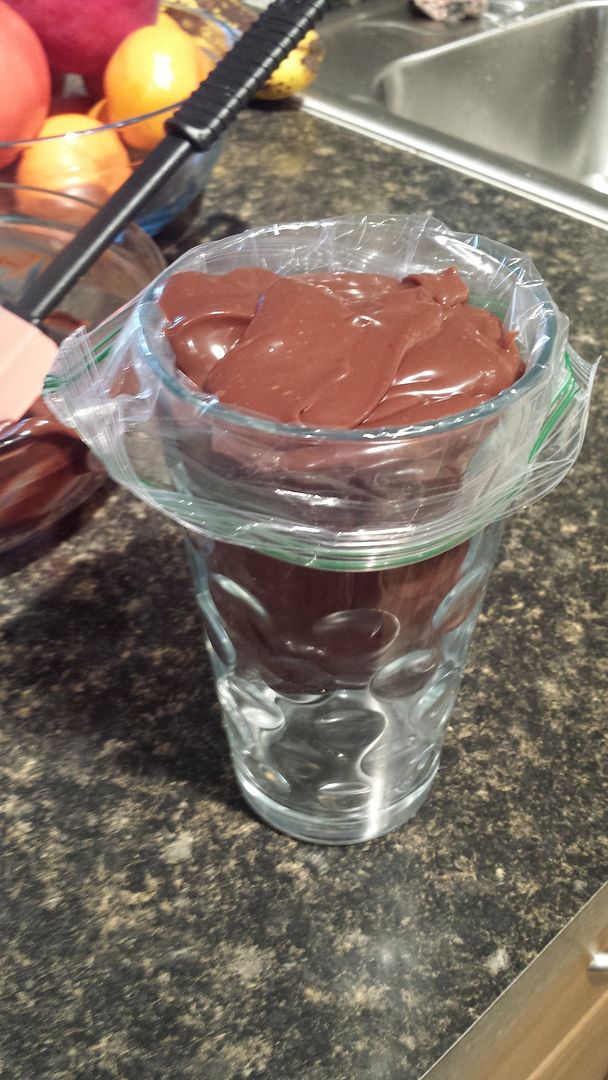
When I filled the cupcakes with the ganache I had to use a ziploc bag due to having misplaced my piping bags. I placed the bag into a glass and then filled it with ganache and then cut off a small corner of the bag. Below are pictures of the ganache in the bag as well as the filled cupcakes.
Bailey's Irish Cream Cheese Frosting
1/2 C. unsalted butter
4 C. powdered sugar
8 oz. cream cheese softened
4 TBSP. Bailey's Irish Creme
Cream together the butter and cream cheese and then gradually add the powdered sugar. Once the mixture is completely combined add in the Bailey's. This part is really only to your liking but I wouldn't add more than four tablespoons, it will taste too strong. The original recipe only called for four ounces of cream cheese but I didn't think it tasted enough like cream cheese frosting so I doubled it and am very much pleased with the results.
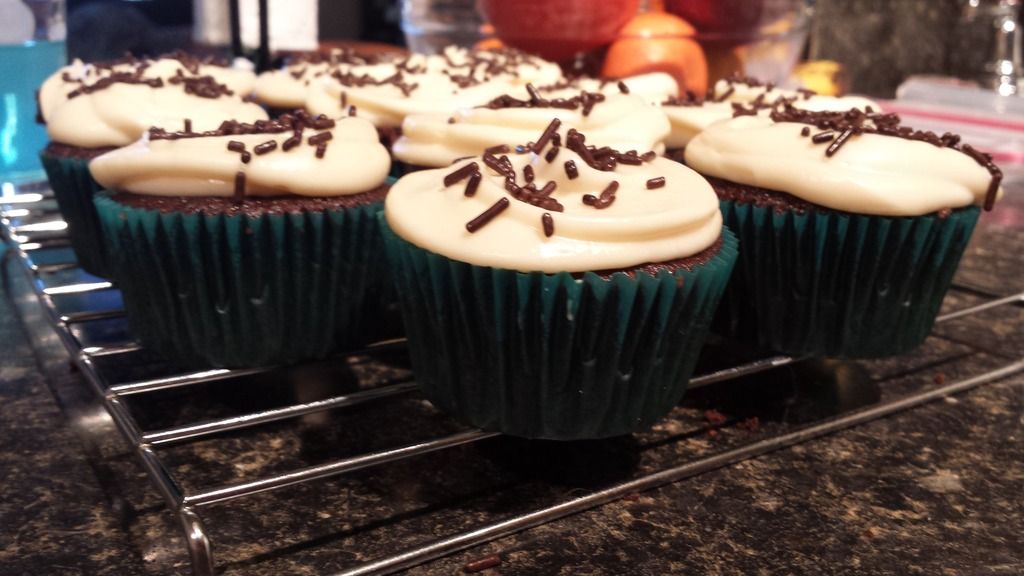
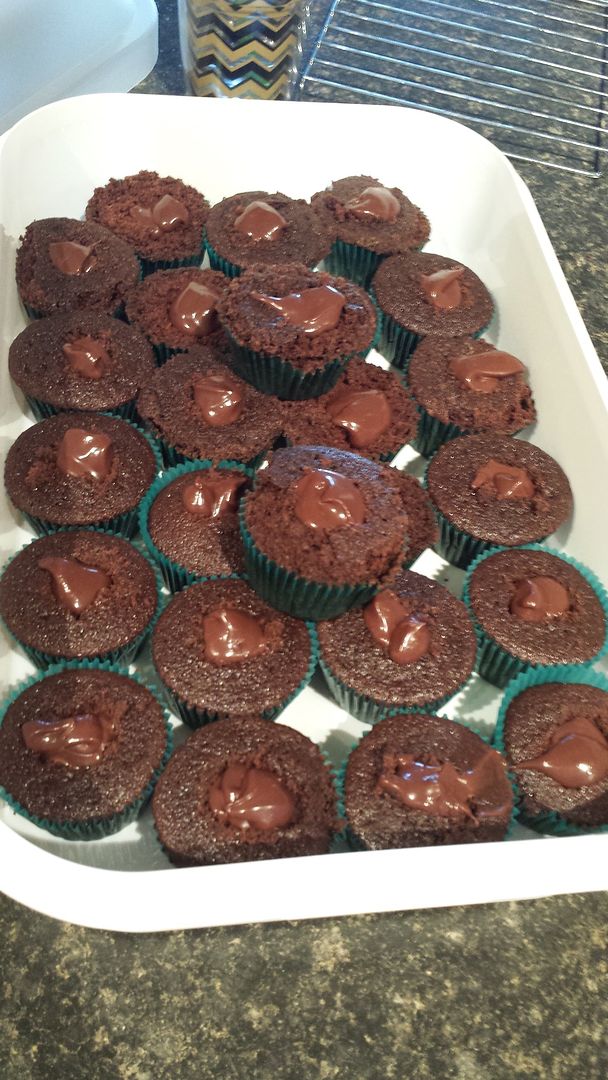
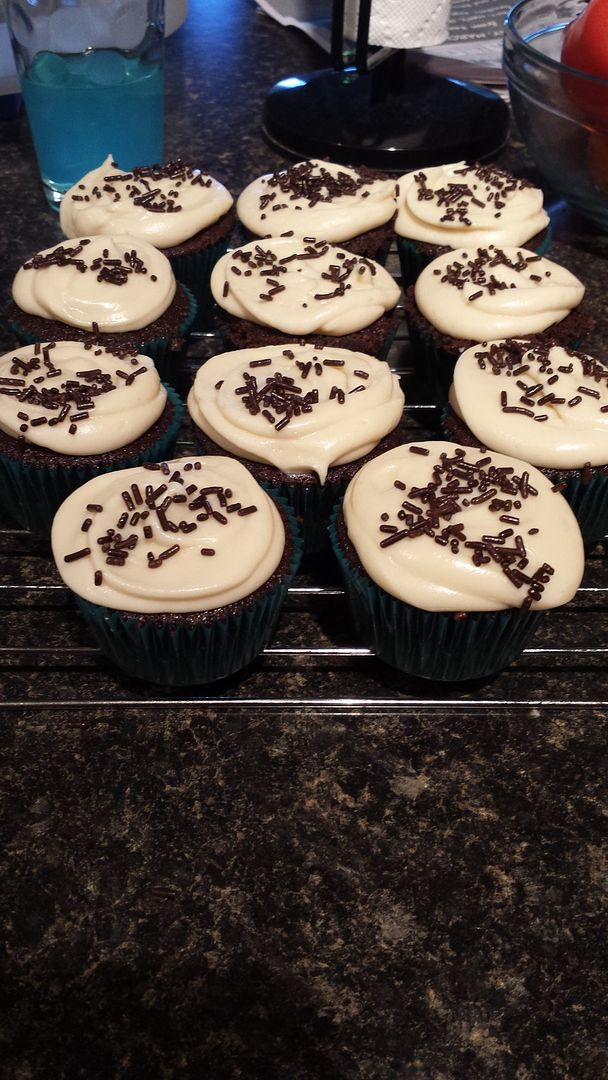
I iced the cupcakes with the same ziploc bag method, this disappointed me because I planned on being fancy but considering my method it didn't turn out too bad. I garnished them with chocolate sprinkles. Ricky didn't seem to like them too much but I'm learning he's hard to please with the different types of things. He said it was again, too rich. I think they're great! Definitely worth a try.
Sources: