Showing posts with label Green Thumb. Show all posts

Tuesday, March 22, 2016

Polishing the Patio


In no way, shape, or form do I consider myself anything more than someone with novice experience when it comes to gardening. I mean, when I was younger botany was my thing but middle school knowledge doesn't transfer well into adulthood. For the last few years, as some of you know, I have been in love with plants and my little patio "garden-" lately though it has been in the need of some serious TLC. 
Yesterday I made it my mission to clean and replant everything that has been needing it (I even said good-riddance to a couple of sore thumbs). This isn't a tutorial as much as it's a follow up from my garden post that I made a year ago. At that point I was IN LOVE with my succulents and I still am today, just a few of them had to go though... One being the original Donkey Ears I received from my mom- this plant is like a contagious disease and it goes where ever it wants and puts babies in the soil of other plants and it just needed to go. I actually put this one by the trash a couple of months ago, but surprisingly enough (yet not really at all) I found some of its offspring still trying to take root last night; don't worry they're gone too. 
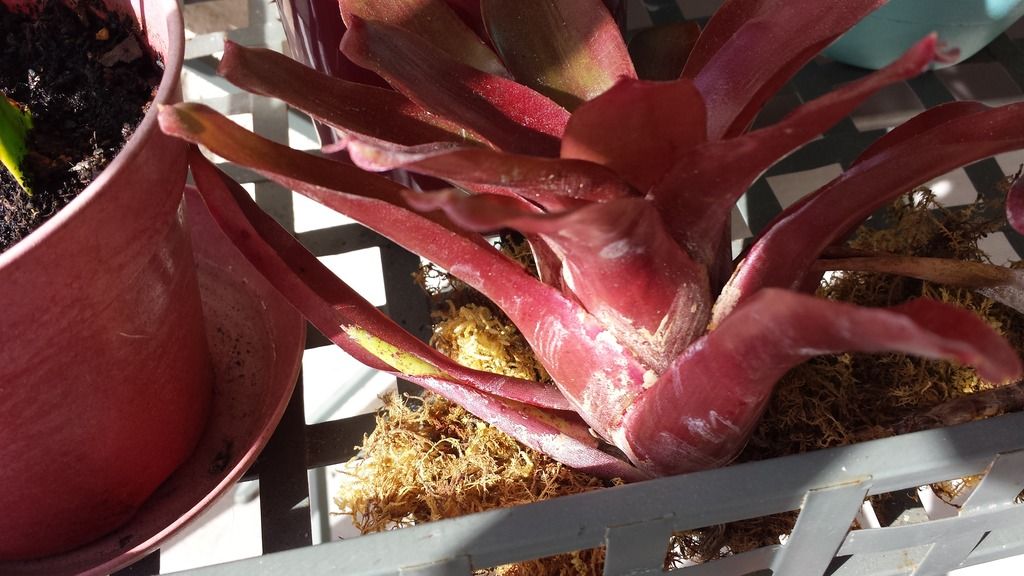
The Kalanchoe Luciae is doing well although the mother plant has since died off. I'm not sure what happened with it but it started to rot at the stem so I broke it off before it took into the other two plants that had sprouted from it. The Neoregelia Fireball is growing nicely, the baby from last year is currently growing its own baby. The two original pieces are dying off but that's normal with this type of plant. Now for the Echeveria Cante! To say this plant is doing well may be sort of an understatement. All of the babies are good and every once in a while I find a stray leaf and allow for it to grow some roots before I toss it into the planter too!
Now I'll get you up-to-date with some visuals!
Above on the left what you see is my spider plant after it had been removed from its original basket. The majority of those roots were entwined in the lining of the basket, I was just amazed with how large the roots actually were! On the right above you see one of my original succulents from my Home Depot trip so many years ago. I was disappointed with this one until recently because it hadn't grown much at all, but now it's sprouted three new plants and should do well in its new arrangement.


All three pictures above are before I cleaned and re-potted. In the top photo you can see the aforementioned succulent in the far left container along with a piece of trailing jade I laid in there a couple months ago, too lazy to plant it. Continuing to the right in the same image is the poor amaryllis that Ricky brought home from work. The bulbs hadn't been stored properly so it began to bloom before it was even potted. When he brought it home it had flowers and hardly any green leaves. Next are two succulents he has brought home over time- one being the same Kalanchoe Luciae. You can see the Echeveria Cante hiding on the ground there too with the babies of the original Kalanchoe Luciae on its other side. 
The next image on the lower left shows the plants mentioned above as well as my Lipstick Plant. Can you see how ratty that basket is?! Yeah, it needed to be changed... I planted this plant in a hanging basket way before I should've, honestly. I propagated this plant from the mother plant at my dad's house, it has taken almost two years for it to grow this big. It's never had flowers but that might be do to Stella always breaking them off while it has been sitting on the ground. Next to it there you can see my Jade in a pot way too small with not enough drainage.
The picture on the right shows a dead bromelaid, my three Christmas Cacti (although they're more like New Years Cacti if you go by when they're blooming!) and a very "let go" succulent. All have been saved, don't fret. 


Christmas Cacti and Amaryllis happily planted in their new homes.


I combined the two succulents and the Trailing Jade in this container, it looks much better this way! I didn't change anything in the plant on the right. You can also see my sweet potato project poking up in the middle!


Happily hanging in brand new soil and baskets! I'm worried that the larger basket will allow for my spider plant to grow too heavy... but hopefully that doesn't happen. In the right photo you can see where I replanted the succulents Ricky brought home as well as a better angle of my Echeveria. I put the Jade in a larger pot with fresh soil, I'm hoping it grows larger now.

Happy planting!


Monday, March 16, 2015

Vertical Herb Garden

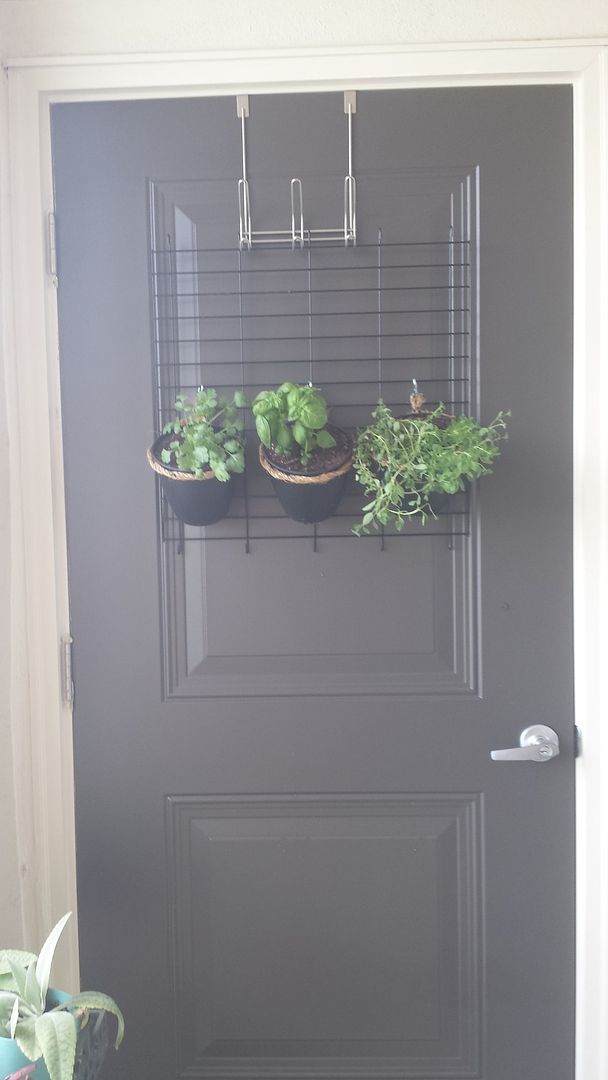
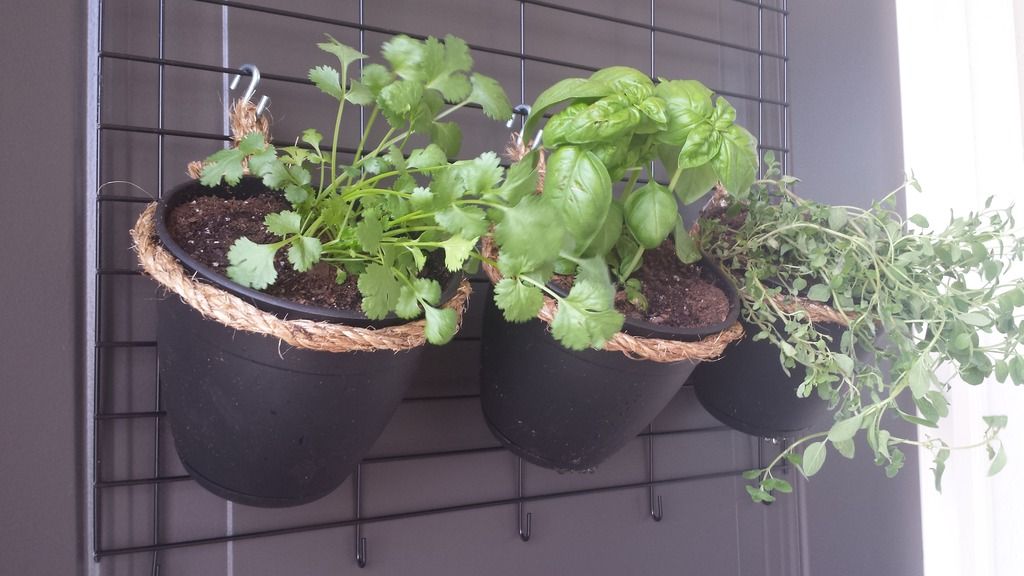
When cleaning up my patio I found a piece to Stella's crate which was tossed out here (why it never made it to the trash I don't know). Alas it stuck around and just as I was about to trash it I gave it a second glance- this piece of cage could in fact be used as a trellis of sorts! Then I was confronted with the everlasting issue of hanging space on my patio; I tried to hang a planter from the wall only to discover you need a special drill bit to screw into stucco, or maybe a more powerful drill than mine. Then I looked at the closet door! If there was a way to hang it from the door... I was inside getting an over-the-door hanger in mere seconds. It worked! Just place the hanger on the door and hang the grate from it and voila! I've created a trellis.
Now the task was to buy herbs, pots, and some sort of doohickey to fasten the pots in order to be hung on the trellis. I imagined three small herbs hanging on the lower portion and a vine hanging on the top half. For my inspiration for the hanging pots I was picturing something like ikea's fintorp, and if all else had failed I would have used that system; I didn't want to jump to that though because I wanted this to be 100% my own.
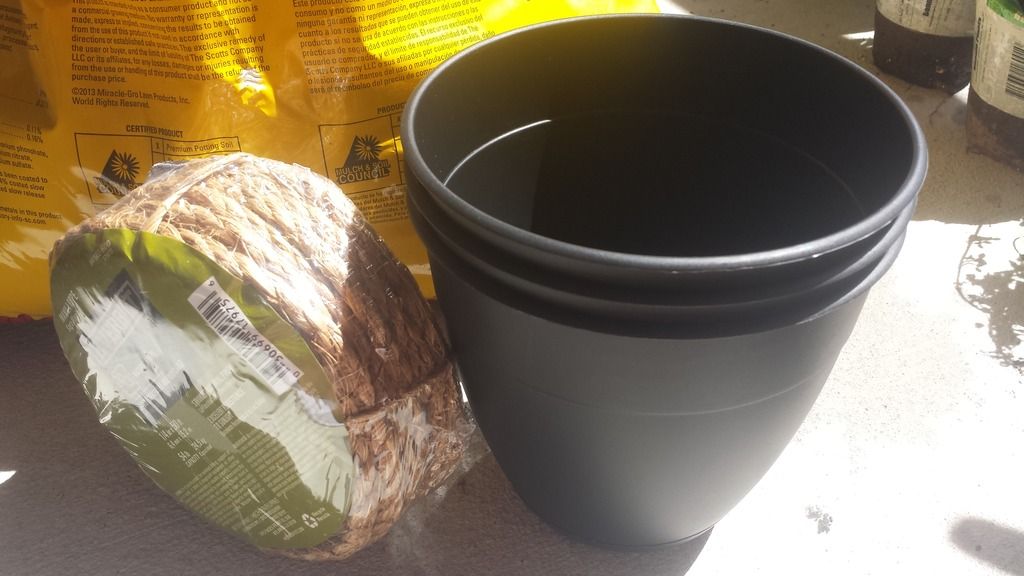
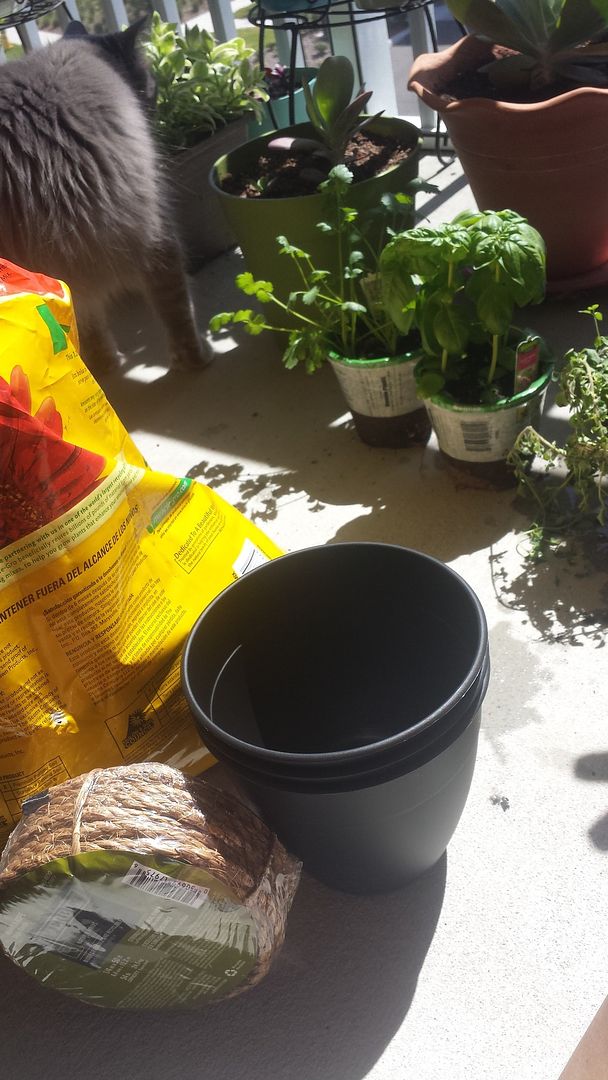
Next stop: Home Depot. I started in the garden center and found three herbs: basil, cilantro, and oregano (they were 5 for $10/$2 each). I then tried to search for a vine... I failed miserably. I found some ivy but it was too large for my project, I also found some other plants that I thought were vines but I wasn't too sure so I didn't purchase them just to be safe. I grabbed three black pots ($2 each) from there as well. Now when it came to fastening the pots my initial plan was to take some sort of metal and wrap it around the pots' tops and then fasten an S-hook to the pot for hanging. Not until I was at Home Depot did I realize that this was difficult. So then I moved on to picturing wrapping rope around it and the hooking the S-hook onto it, in the same fashion but this would look more appealing and match the style I have on the patio. I found some nice rope for about $3. I found a door hanger at Target that was on sale for $5 so it seemed like a steal despite the tacky yellow color... but when I got it home I noticed it didn't quite fit over the door on the patio due to the thickness so I had to switch it with the one in the bathroom... Now I have a tacky yellow hanger in the bathroom.
It wasn't until I began this project that I realized how annoying this rope was to work with... I kept trying to wrap it and make what I was picturing all along but it wasn't working correctly and after five or so failed attempts I admitted to myself it wasn't going to work at all, I needed another idea. 
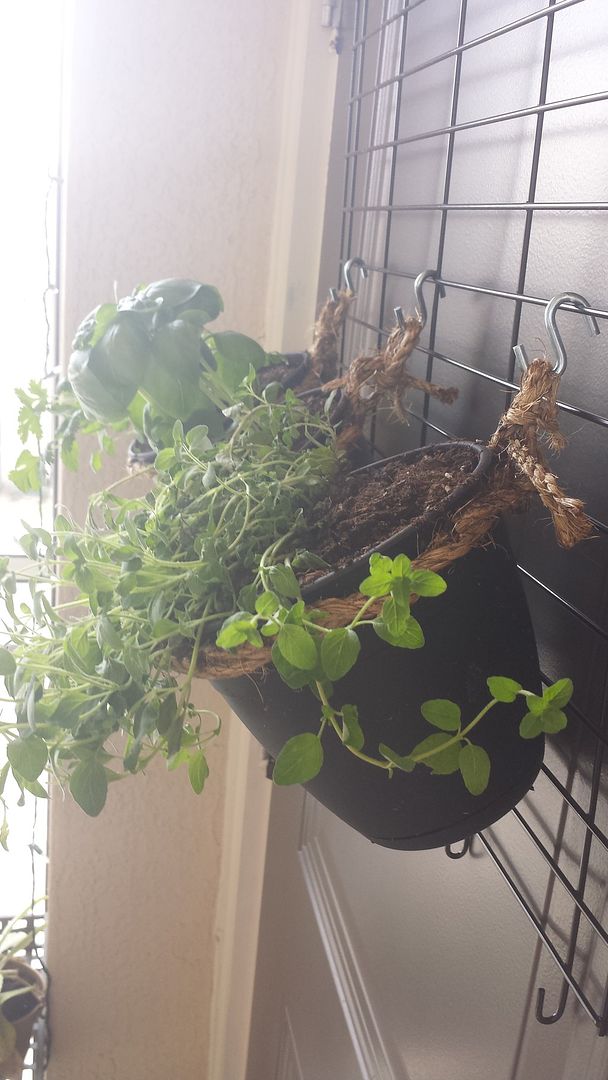
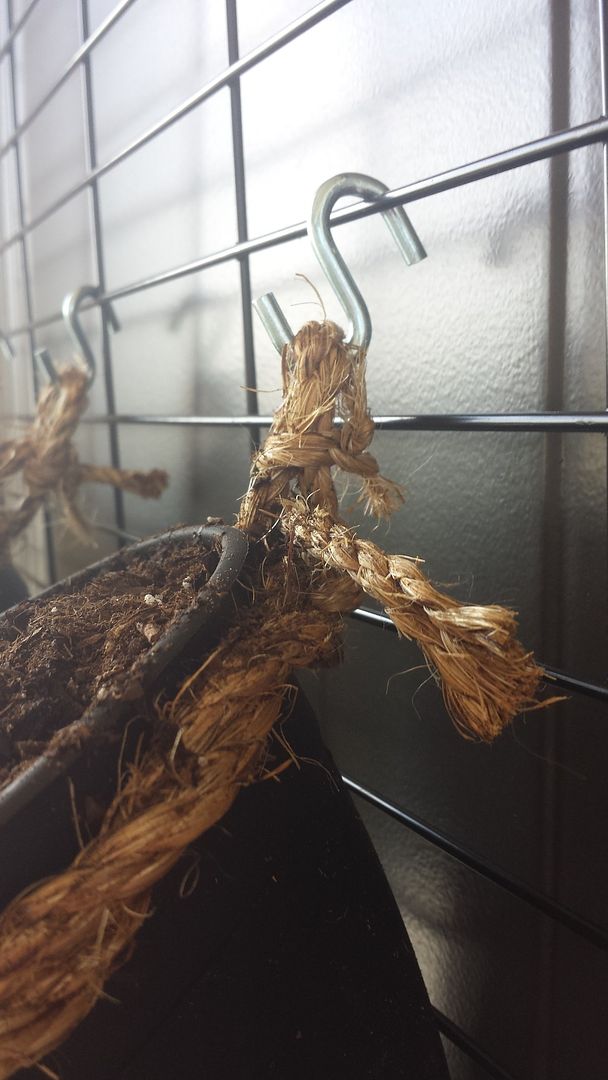
I resulted with cutting a length of rope twice the circumference of the top of the pot. I looped it around the pot, tied it once and the removed it and continued to braid (or twist) the rope around itself. after I completed the circle I put it back on the pot and created a loop with one of the loose ends and tied it with a small piece of twine that was used in the rope's packaging. I tied the other end around as well for a more secure hold. I did the same thing with the other two. I then planted the plants in each pot. The plants I got were placed in biodegradable planters so you just tear off the bottom and plant it. I found that I also needed to tear off a bit from the top so that it covered more easily. But after planting and watering my project was complete! Now all I need is a vine for the top, I think I've decided on a sweet potato vine because it's cheap and it's something I can root in my own kitchen and I can never say no to that! Over all I spent about $20 on this, I don't think that's bad at all for how it turned out and I'll save money from now on on fresh herbs! 


Thursday, March 12, 2015

The love of my garden: Succulents

I can count on a single hand the amount of things I know about succulents:
They require minimal water & they love sunlight.
They propagate & do so more efficiently when left alone.
When they're unhappy with their environment they begin to grow spaced out.

That is all. Or at least that was all until I fell in love with them.

Never did I enjoy gardening. Then one day, after a stressful week I decided I needed to give myself something to keep busy. I went to Home Depot, bought a few regular houseplants and went home and planted them. Knowing of my new hobby, my mom begin telling me about this plant she has. She doesn't know what it's called, just that it can reproduce very easily. I bring a small one home and plant it. Then I learn that this plant is a succulent- a Kalanchoe Gastonis or Donkey Ears, more specifically. Quickly the internet makes me want more of these intriguing plants. So I go to the store and the next thing I know I'm taking leaves from planters in shopping plazas and trying to propagate each and every one I find. Fast forward a year and a half or so and here I am; with fourteen different varieties of succulents & cacti and two regular old houseplants (two of the original four!). Seems like a lot to cram into the small space now come to think of it... 
I have yet to master the propagation technique where you cut the stem in two, plant the rooted piece and then wait for roots to grow from the old top piece. The rooted piece always works, but the top never grows... Maybe I just failed a few times so I'm afraid to waste a succulent trying again, I don't know. 

Let's go over a few of my favorites...
Kalanchoe Luciae
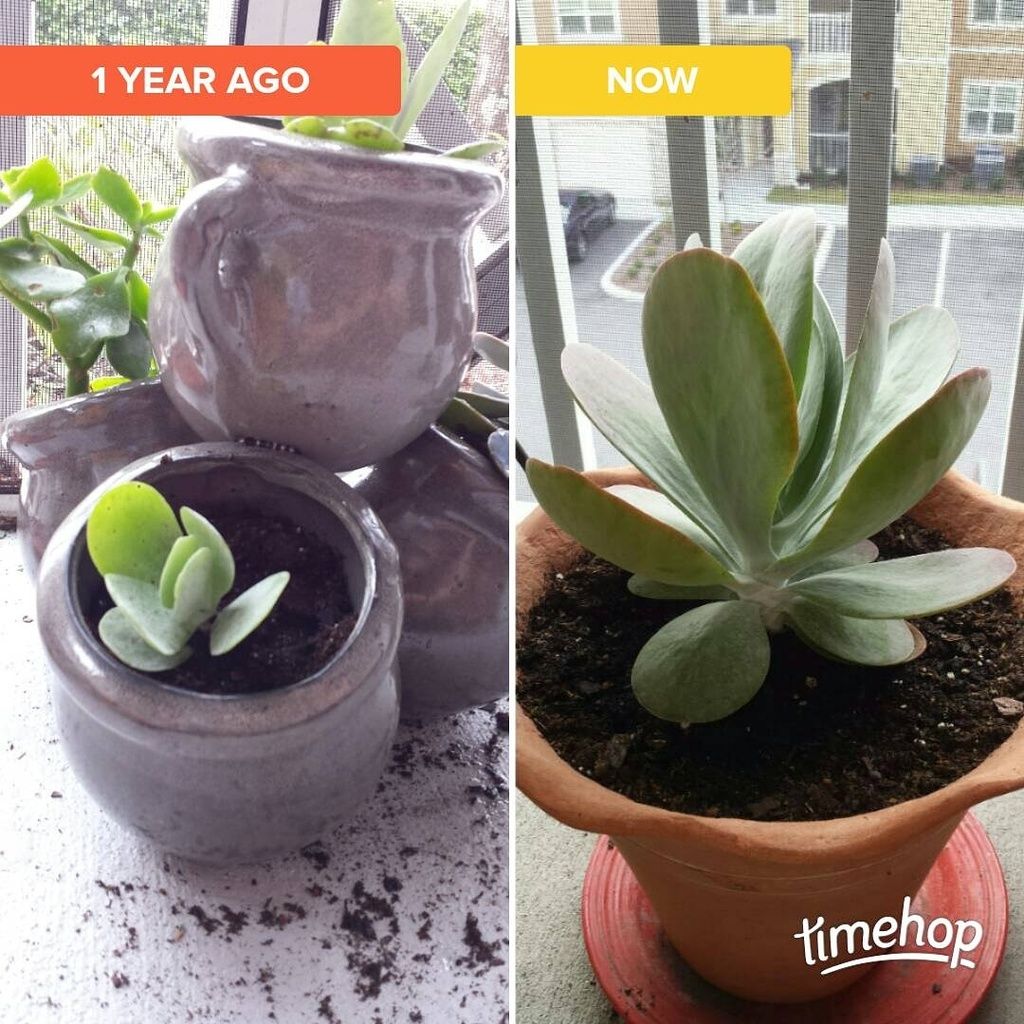
This plant may just be the epitome of why I like succulents so so much. All I did was pluck a little pair of leaves from the middle of a large, clustered pot at my moms house and it grew its roots then I planted it. Unlike the mother plant, it doesn't have any red around the edges, but as far as I know that's not an issue so I'm not worried about it. In case that picture isn't a good scale, the plant on the left could easily fit on the lowest leaf on the plant on the right... One year. The past few days I've noticed a small baby plant poking out from under one of the leaves of it, I'm pretty excited to see where that goes. 

Neoregelia Fireball 
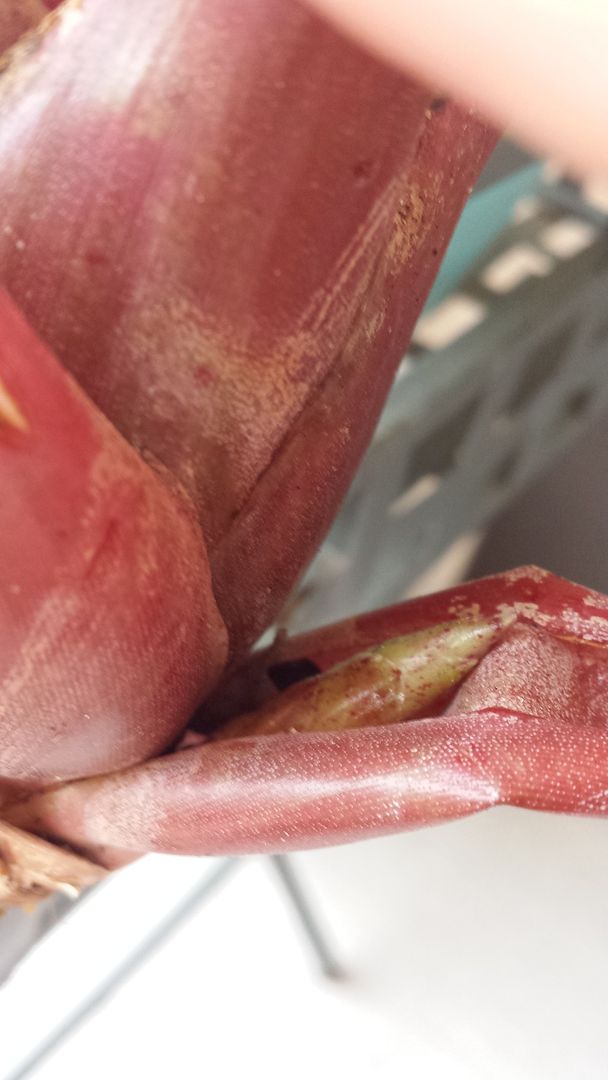
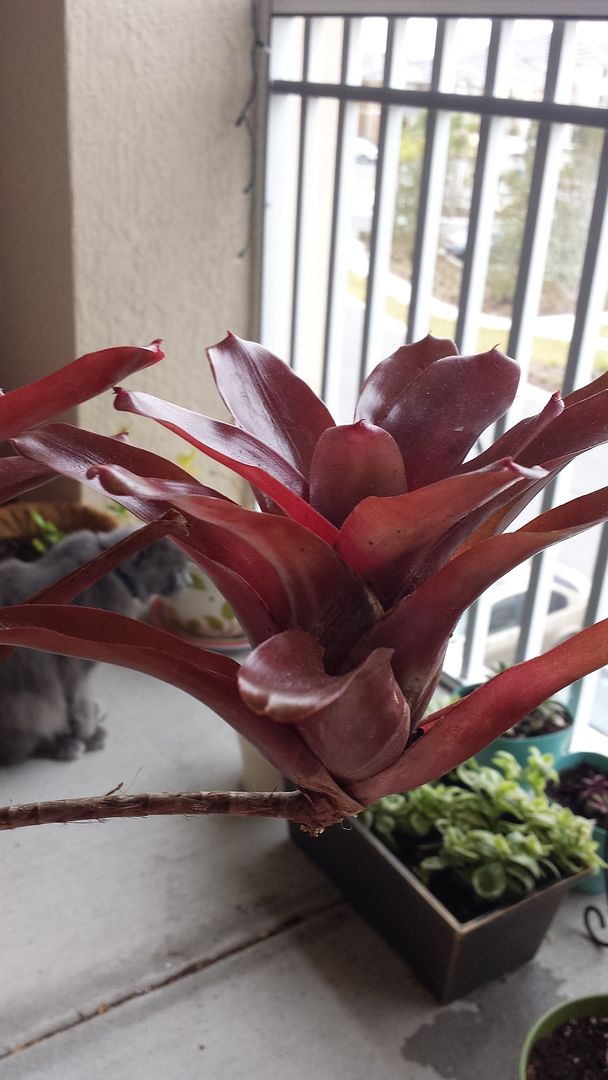
This is another plant I received from my mom. She had gotten a large cluster of them from a friend and just broke off two for me. She told me that it didn't need planted, I could hang it or sit it somewhere and it would do fine, I only needed to water it down the center. She was calling in an air plant (although it looks strikingly similar to a bromeliad). When I got home I searched for types of air plants. I exhausted all of my resources and came up with nothing. So I ended up installing an app on my phone where you take a picture of the plant and an expert responds with the name. My picture was returned as "Neoregelia 'Fireball' of the Bromeliad family." This surprised me seeing that while it is very similar in looks to a bromeliad it is very different in how it grows. I was pleased in knowing what exactly it was but I still had another question- "how does it grow?" So I waited. A few weeks passed and I noticed the little stem sprouting out from the side. I was so joyed to see the growth! In the past two weeks the stem has doubled in size.

Echeveria Cante
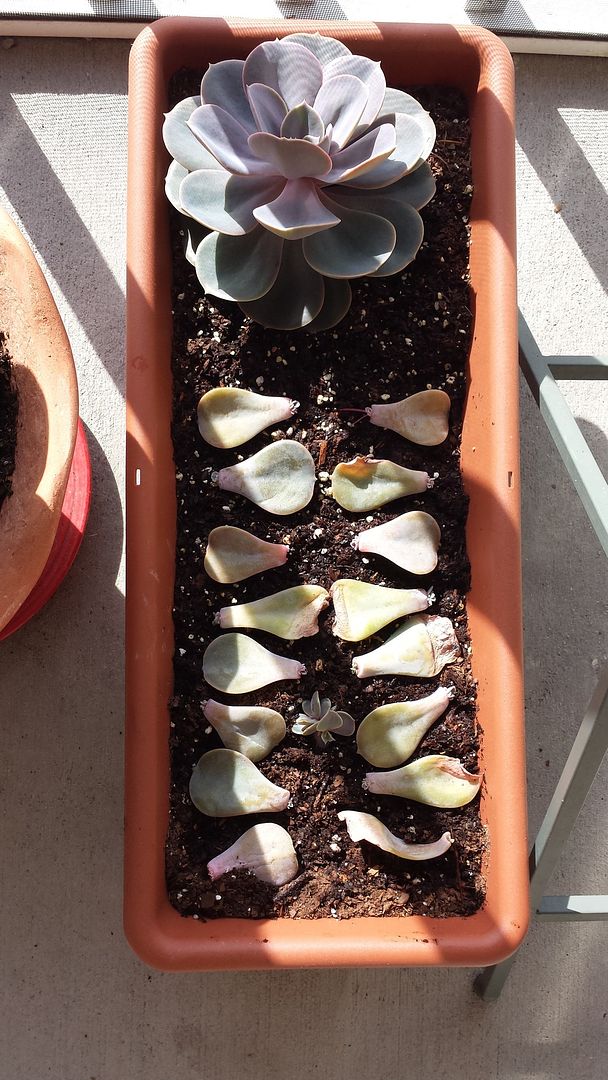
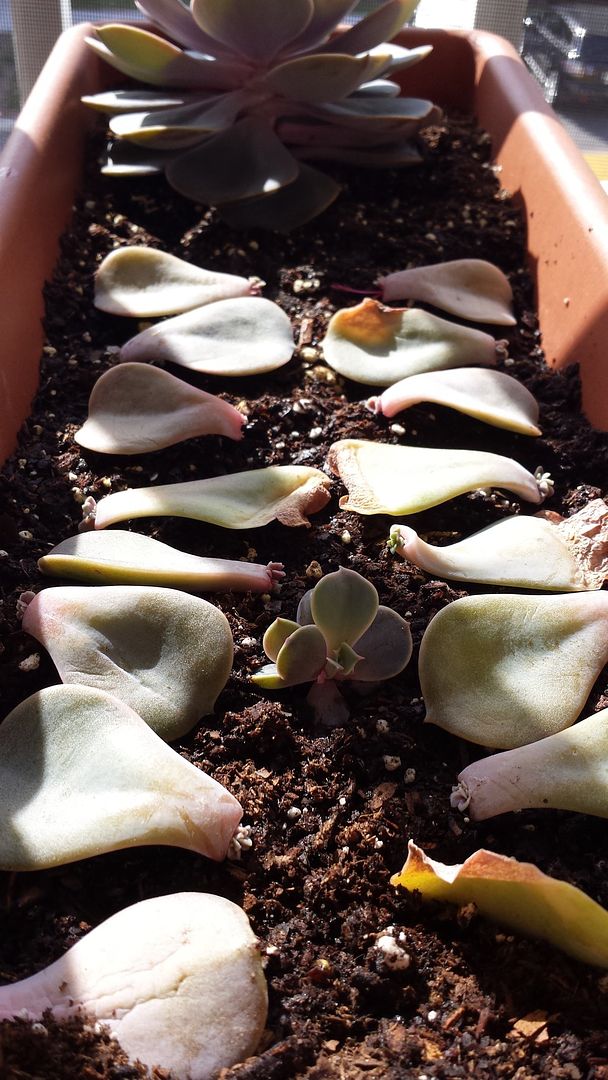
I think this one is my favorite of all only because after so much stress it's finally doing well. When I bought this succulent it was on the clearance rack; dying and unwanted. I brought it home, broke off the bottom spaced out leaves and planted it. The leaves withered and didn't propagate (my first attempt) and the plant still grew lanky and spaced out. So I unearthed it and repeated the process minus the attempt at propagation. Nothing. Still happened. Then I resorted to a new planter and bought the one in the pictures above. That worked! It grew happily in this planter and then I found a leaf hiding on the ground that had fallen off and grew a tiny little plant all on its own (this is the only succulent I have had issues with that with). So I took the baby pant and placed it in the planter where it began to slowly root itself. Then Stella happened. One day I go out to the porch and notice that my dog has uprooted my most temper-mental succulent. I was devastated. I knew that was the end. I knew it was dead. Done. The plant and its only "child." Alas I saved it but I lost tons of leaves in the process (the ones pictured in the planter and then some). After I finished potting it I tossed the leaves here and there on the porch, testing out lighting and moisture to see what worked best, not hoping for much except for the main plant to survive. And survive it did. Let me add that under that soil the stem of the plant is about a foot long from all the stress this poor thing has gone through... But stress no more because not only is the plant doing well but so are the, not one, but seventeen babies that have grown from its leaves! Yes, each and every leaf laying on the soil has new growth. I've never been happier with it. 

I'll post an update when new things happen with these plants, I think the changes are exciting. 
Also, if anyone has any information on these succulents (even if you're only fixing my mistakes) I would love to hear it- so please feel free to leave a comment below!