Showing posts with label Sweet Treats. Show all posts

Tuesday, June 7, 2016

Hawaiian BBQ Pizza Party


While at work last night I got a craving for two things: BBQ pizza and chocolate. Together those two items my have been disastrous, but separate they're both decadent and delectable! Now just how do I have these things but stay healthy at the same time?
I've been doing so well on my Fit Girl journey that now it's almost to the point of being a lifestyle. After three months of clean eating (not always) and attempting to get regular exercise, I can say that I've hit the ten pound mark. This is something I knew I could do since day one but it's surreal to actually see it on the scale. I've been here before, just a couple of years ago I weighed less than this, but to see the numbers diminish and to know that I can say I will never allow for my body to be that heavy without proper medical cause again- that's so fulfilling. I can only imagine where I'll be two months, even two weeks, from now! 
I took my first Orange Theory Fitness class a week ago and I was super skeptical going in, but it was free so I didn't care whether I liked it or not. Tonight I'm purchasing my first ever paid gym membership because that was hands down the best one hour workout I have ever had. When in college I frequently went to the school's gym where they had everything you could want out of a fitness center. I took classes anywhere from Zumba and Pilates to basic core and strength workouts; did the same kind of routine week after week with little to no results. After college a friend and I went together to Planet Fitness and we would workout for an hour or so and saw nothing. I know eating habits make a larger impact than the gym does but to see no results can be defeating. Even after the workouts, and the days following, I didn't see much results or feel any soreness- in my eyes it wasn't working. With Orange Theory you basically have a personal trainer by your side the entire time telling you what to do and they're making sure you're getting the best possible workout for your body. I'm going to start with one class per week and then after I feel committed enough I'll bump it up to two classes a week. 
"Blah, blah, blah, we didn't come here to read about fitness, where's the pizza?!" Okay, okay, I'll dish it out now. After a quick Pinterest search on the way to my car I found a recipe for Hawaiian BBQ Pizza that I thought was good enough for me. I was basically using the recipe as a guideline for what ingredients I needed to purchase, I wasn't going to follow it while baking my pizza. I grabbed all of the ingredients from Publix as well as some other things I needed to make some cookies (I know, not very Fit Girl of me, but sue me!) and I headed home to whip up a masterpiece. While the pizza was in the oven I calculated the nutrition facts and it came in at a pretty good standing in comparison to the other Fit Girl's Guide meals I've been eating. The only thing was the sodium was a little (okay maybe more than a little) high... but I'm not telling you to eat this every day! My initial plan was to bake it on a pita bread like my regular pita pizzas but even with the single serving pizzas I usually have too many toppings and it becomes a mess. So I settled for a normal whole wheat pizza crust. With turkey bacon, chicken breast, red onion, and pineapple this BBQ pizza came in at under 400 calories per serving which is almost as much as a single Fit Girl's Guide dinner so I was right where I needed to be! I'll put the recipe down at the bottom of this post.
For the chocolate craving I decided to make peanut butter no bake cookies because I thought I could make them in a healthier way than usual. Well with 1/2 cup of butter I don't know how "healthy" I could've made these cookies. I followed this recipe and substituted a couple things for healthier options. Instead of regular milk I used almond milk, I used 100% dark cacao powder to get all of those delicious antioxidants, and I added one scoop of vanilla protein powder to get that extra boost of protein because I honestly don't get enough without it. I ran out of parchment paper when it came time for them to set so I laid the rest down on aluminum foil- don't do that. The ones on foil didn't set at all! While they're still delicious and edible with a spoon, they don't have their cookie-like shape; I moved them over to the parchment paper to dry out. 
I hope you love my pizza recipe and I hope you give both of these delicious treats a try! 
Happy baking!


Hawaiian BBQ Pizza 
Servings per pizza: 4 || Serving size: 1/4 of pizza
Calories: 389 || Fat: 12 g
Carbs: 51 g || Protien: 22 g
Ingredients
1 whole wheat pizza crust
1/2 C favorite BBQ sauce (I used Sticky Fingers Carolina Sweet)
1/2 C canned chicken breast 
1/2 C pineapple tidbits
2 slices of cooked turkey bacon (I used Jennie-O)
1/4 C chopped red onion
1 C mozzarella cheese
cilantro, garlic powder, and fresh ground pepper to taste

Preheat the oven to 400 degrees. Spread BBQ Sauce evenly over pizza crust. Top with 3/4 C of the mozzarella cheese. Place all other toppings on and top with seasonings and remaining 1/4 C of cheese. Bake for 12 to 15 minutes in preheated oven. Let cool for a couple minutes before slicing into quarters. Serve & enjoy!


Monday, April 11, 2016

Epcot Flower & Garden Festival 2016


This year my friend and I decided to get annual passes to Walt Disney World; we go at least once a year and I wouldn't mind being able to go whenever I want so it seemed like a great idea. Now that I have purchased my pass and have experienced the park as an annual passholder I have to say it's a great experience. To be able to go to the park without trying to cram everything into a single day is in itself rewarding, if you live relatively close to Disney I would totally recommend getting an annual pass.
I have been to the Food and Wine Festival at Epcot on two separate occasions and was pleased with the outcome both times so I was excited to learn of another festival at Epcot: the Flower and Garden Festival. Much like the Food and Wine Festival, the Flower and Garden Festival has different booths spread out among the countries at which you can purchase unique food items and beverages that you can't get the rest of the year. I approached this new found festival not having looked up any of the offerings, so I was full of hope as I was voyaging around the world showcase. 
When we go to the festivals, my friend and I prefer to do two things: 1) we don't like to get dessert on the first round, that way we can have all the savory snacks we want without mixing our palate and 2) we always start in Mexico and work our way around. I'm going to address the booths in order of when we approached them, whether we got something there or not. 

Tuesday, July 7, 2015

Quest for Healthy Snacks

Let me begin by saying this post is going to have a different layout than my previous postings. I am going to write this as I progress through with making these snacks, I'm doing it this way because I have a very strong feeling that my thoughts are going to fluctuate a lot during this process. They've already changed a tiny bit. Let's rewind to yesterday afternoon when I thought of this brilliant, fool-proof, plan...


June 9th, approximately 3:30 pm

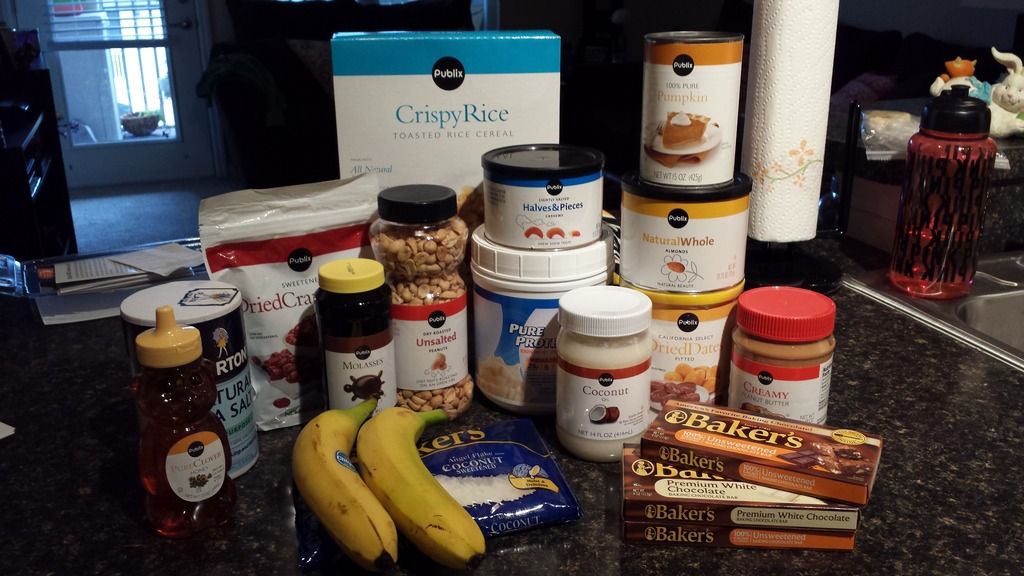
I was sitting on the couch relaxing, watching my recorded shows as it poured outside meanwhile  browsing through pinterest (what else is new). I came across a pin that read something along the lines of "35 HEALTHY Energy Bars" in the main picture was a somewhat boring looking peanut-butter chocolate protein-like bar. Nonetheless I was intrigued. I clicked on the link and began to read through the beginning of the article. "Better than store-bought snack bars...", "All the flavor without the artificial sweeteners or GMOs!" I was even more accepting to this new idea. I was trying to be healthy, right? And I had just read something else somewhere on the internet that GMOs and artificial sweeteners are super bad for you, especially if you're trying to lose weight, sooo why not. Let me add in here that never ONCE in my life have a given a damn about artificial sweeteners, GMOs, gluten or any of the other new health fads so why I'm suddenly on the band-wagon is unknown to me.I read through the titles of the bars and four of them stood out to me: a pumpkin one, a peanut butter chocolate one (coincidentally the one from the main photo), a honey nut one, and a white chocolate raspberry cookie-like one. Over achiever me decided that I needed all of the ingredients in my house ASAP. So I decided at that point to go to Publix the next day after work.

June 10th, 3:45 pm

I made it to Publix as promised. Proudly I grabbed a basket (not a cart, surely it will all fit into the basket) and made my way to the furthest thing in the store that I needed, the nuts. Already this wasn't looking good. I was doing a rough tally in my head of the price as I went along, after almonds, peanuts, cashews, dried cranberries, and dates I was at about $22. But I talked myself back down and headed to the next isle because surely this would save me money in the long run and hey! I know what's going into these bars (let's not forget the lack of GMOs and artificial shit). After filling my basket about half way I reach the isle that has the cereal and nut bars. One of the bars I plan to make said on the recipe that it was a homemade KIND bar. KIND bars at Publix are $3.99 per box, each box contains 5. That's $0.80 per bar. Here I was a little let down. In my mind I'm putting in work and money when I could just buy this box for four bucks and call it a day. But my almost complete shopping list and the variety of items I'm going to make gave me the incentive to keep going. With this is mind I was slightly defeated as I approached the sugar and flour area. I was standing there, heavy basket in hand, staring at the sugar. No where could I find Coconut Sugar. No where. So I said screw it and decided regular suits me fine, it's not like I'm going organic or vegan or anything. Next: Oat Flour. Well I found this one. One shelf under the Coconut Sugar. And I didn't buy either one. First of all Coconut Sugar is $8 and change for a small bag- are you out of your mind?! The flour was $5 for a small bag as well. Neither package said anything that would make me believe it was any healthier than the stuff I already have at home. So because I do not eat strictly organic and I am not gluten-free or vegan I decided against these two. I finished up at Publix and left the register with a $62 receipt that accounted for four bags of groceries. Four. As I put them in my car I told myself that it's fine. If each recipe makes about 25 bars total (they'll probably make more but I don't want to set myself up for disappointment) and then with these ingredients I can make them each three times I'm at 75 bars. The KIND bars were $0.80/bar so then I would be at $60. That's close enough to breaking even- yet I feel like I'm trying to psych myself up. I guess we'll see.

6:38 pm

Pumpkin bars and half of the (not peanut butter) almond chocolate bars finished. The pumpkin bars made eight... I also didn't put them in the proper container. Instead of the instructed 8 inch pan, I divided the mixture into cupcake liners. This worked well enough for me and there was no cutting involved so win-win. The bottom half of the nutty chocolate bars is bland. This is disappointing.

June 15th

I finally got around to tasting the final product of the almond chocolate bars. The entire pan is getting thrown away. Maybe if you like dark chocolate mixed with shit it's good, but personally I don't. The whole mixture is flavorless and completely disappointing. The pumpkin bars on the other hand are yummy. They're kind of sticky but I eat it with a fork. They have to be stored in the freezer so the consistency stays; I would make these again. I need to make the other two bars but I just don't want any more disappointment, especially when I've invested so much into this.

June 29th 11:50 pm

Today marked one week since I began going to the gym and eating healthy, everything is still good there. In lieu of this I decided to make one of the other delightful protein bars. I just finished cleaning up. I made the white chocolate cranberry ones this time, they're my second favorite (not that the competition is strong or anything).They definitely have the feel of cookie dough, do they taste exactly like it? No. Not at all. But was I expecting that at this point? Definitely not. The mixture was really weird in the beginning because it was super crumbly and I was beginning to doubt it's ability to meld together; alas, it did. The recipe said to put the "cookies" on a sheet tray and refrigerate for at least 30 minutes before consumption. I had a few issues with this bit of instruction: I don't have space in my fridge for that, I'm not eating them tonight so they need to be in an airtight container, I do not have said airtight container to store x number of cookies without them being mushed together. My solution to this issue? Shove all the dough into one tupperware container to later be portioned as I wish (aka I'll eat it with a spoon). This isn't something I can see myself gorging on, in the same way you can only have so many eggs or pancakes, you get full of it. But it seems okay. But so far just okay...

July 7th 10:30 pm

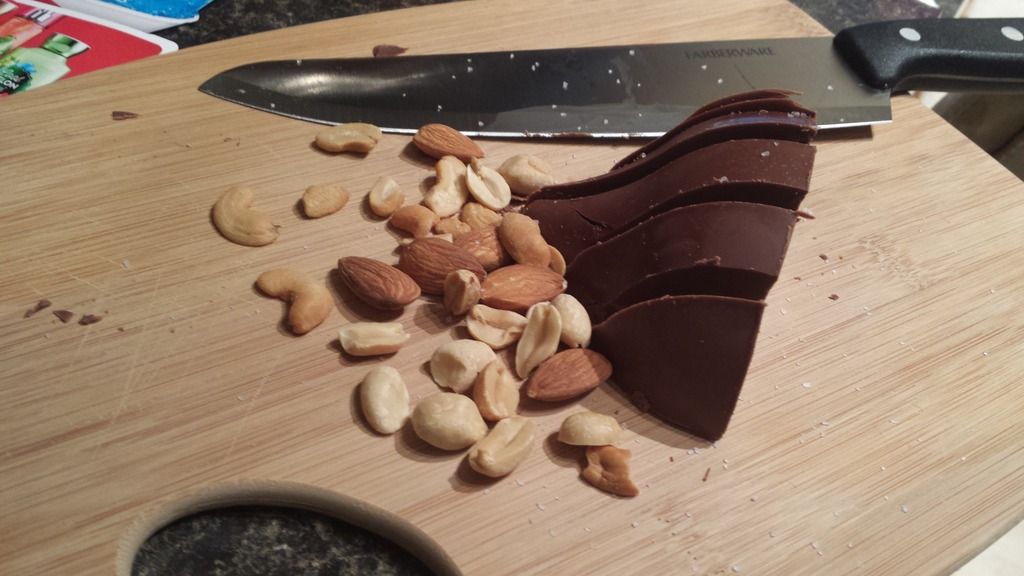
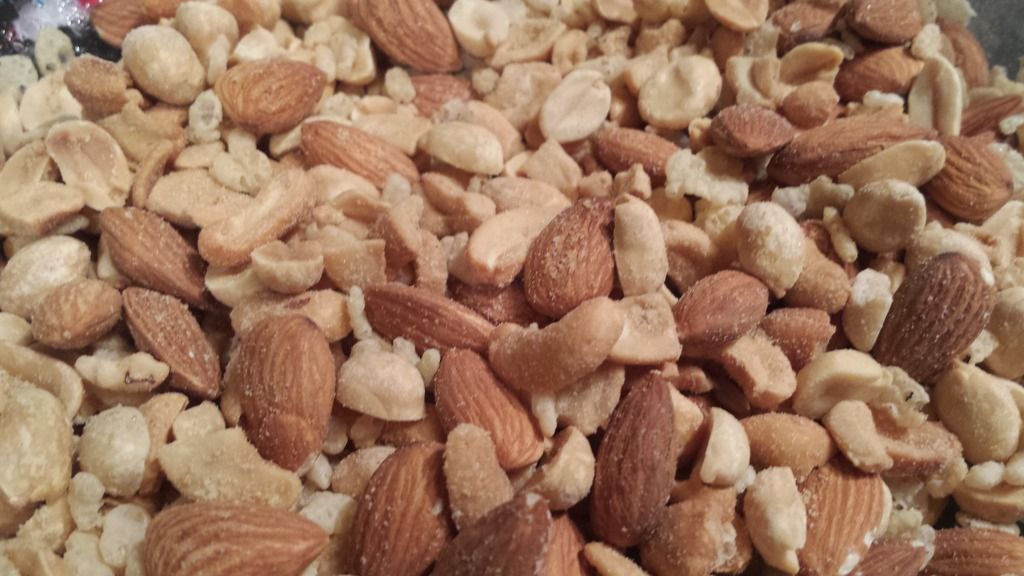
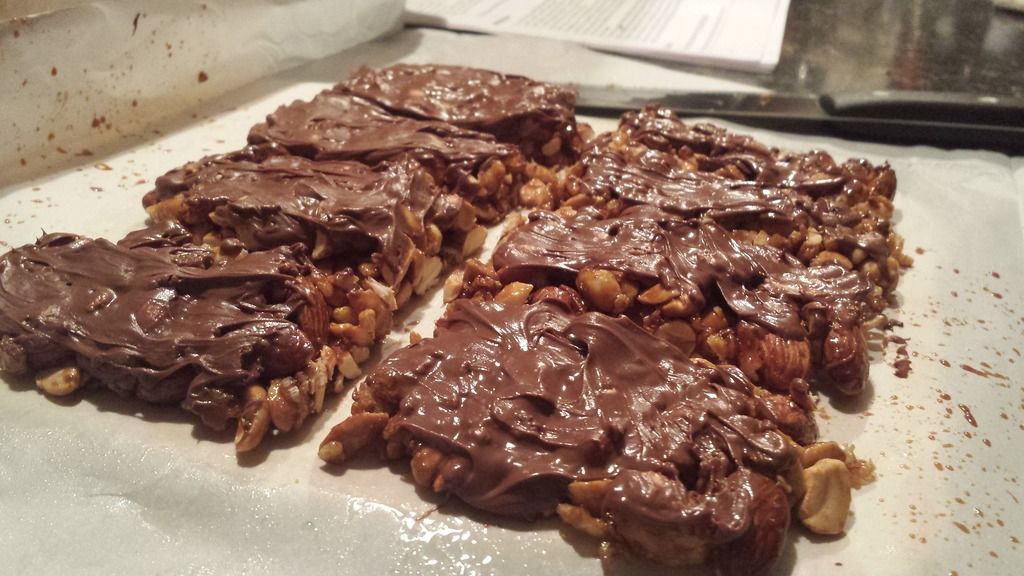
I have finally made it around to finishing the last of my four "healthy" snack/protein bars. This one is my favorite hands down. Before I dive into the details let me talk about the white chocolate cranberry one for a second. Like I said before, it's just okay. I can eat like a spoonful of it but that's all. It's hard to swallow after that, it's like something you don't want too much of, definitely. But I was trying it right out of the fridge, maybe at room temperature it's a little better. Either way it's not a complete failure. The bars I made today were the KIND bar copy cats- they're great. The molasses and honey mixture with the chocolate and the nuts, it's all great. They didn't stay together completely firm, but that's probably because they're missing the bad stuff (like maybe those GMOs?) that's in the store bought version. Also when I made it I didn't drizzle the chocolate over the top because my chocolate began to seize... so instead I just spread the chocolate on each of them, the more the merrier! This only makes eight bars, about one by two inches each, but I have enough nuts left to make eight more at least. I think you could also experiment with dried fruits or pretzels and different nuts for a wider variety. I liked this one so much from the very first step that I even snapped a few pictures!


Overall was this a complete failure? No. But would I spend this much on this big of a flavor risk again? Not a chance, especially when you consider the amount of bars each recipe actually made... So behold, the fabulous recipes that brought these joyous and wonderful flavors to my kitchen. I pass them on to you so you could put them in yours!

"Amazing" Energy Bars aka Almond Chocolate Shit

Almond & Coconut Layer
1 C Almonds
1 C Flour
2 Ripe Bananas
1 TSP Vanilla Extract
1 TSP Sea Salt
2 TBSP Coconut 

Chocolate Layer
4 oz Dark Chocolate
1 small Avocado
2 TBSP Sugar or sweetener of your choice
1 TSP Coconut Oil
1/2 TSP Vanilla Extract

Blend the flour and the almonds in a food processor until fine. Combine the remaining ingredients for the almond layer and add the flour mixture to it until a dough is formed. Evenly press the dough into a 8-inch pan lined with parchment paper. Refrigerate while making the chocolate layer. 
Blend the avocado, sugar, and vanilla until smooth, set aside. Melt the chocolate and coconut oil in a double boiler until a smooth mixture. Add to the avocado mixture and stir until combined. Remove the almond layer from the fridge and top with the chocolate layer, Refrigerate for 30 minutes before consuming. 

Pumpkin Pie Energy Bars

1 C Pitted Dates
1/2 C Cashews
2 TBSP Coconut Flakes
1/4 C Vanilla Protein Powder
1 TSP Cinnamon
1/2 TSP Pumpkin Pie Spice
1/4 C Pumpkin Puree

Line an 8 inch pan with parchment paper. Combine all ingredients in a food processor. Continue to mix the ingredients until a smooth mixture is formed. The batter will be sticky so be patient while working with it. Smooth the batter into the prepared pan, use the back of a wet or greased spoon to smooth out the top. Freeze for 2 to 3 hours or until solid. Store in the freezer until ready to eat. 

White Chocolate Cranberry Cookies

3 C Flour
2 scoops Vanilla Protein Powder
2 TBSP Sugar
1/2 TSP Sea Salt
1/2 Cup & 2 TBSP Peanut Butter
3/4 C Honey
1/2 C Milk
1/2 C White Chocolate Chips
1/2 C Dried Cranberries

Line a cookie sheet with parchment paper and set aside. Combine flour, protein powder, sugar, and sea salt in a large bowl and mix well. Heat peanut butter and honey in microwave until smooth and well mixed. Be sure to do this step on about 20 second intervals to be sure not to seize your butter. Add this to the dry mixture and stir until fully combined. Gradually add the milk, about a tablespoon at a time. Mix in the chocolate and berries. Form small balls and flatten them onto the cookie sheet (as you would snickerdoodles or peanut butter cookies). Place in the refrigerator for at least 30 minutes.

KIND Bars Copy Cat

1/2 C Almonds
1/2 C Peanuts
1/2 Cashews
1/3 C Rice Cereal 
1 TBSP Flaxseed
2 TBSP Molasses
2 TBSP Honey
1/2 TSP Vanilla Extract
1/2 TSP Sea Salt
1/2 C Dark or Milk Chocolate for melting

Line an 8 inch pan with parchment paper and coat with cooking spray, set aside. Lightly grease a large mixing bowl and combine the nuts, cereal, and flaxseed. In a saucepan combine molasses, honey, vanilla, and sea salt and bring to a boil. Continuously whisk the mixture over medium heat for two minutes. Mixture will become foamy and bronze in color. Immediately pour the mixture over the mixed nuts and combine. Pour the nut mix into the prepared pan and press firmly and evenly into the pan. Allow to sit for about 20 minutes. Lift the block out of the pan and set on cutting board- cut into eight bars. Melt the chocolate in the microwave on 20 second increments taking care to stir in between so it doesn't seize. drizzle the melted chocolate over the bars (or in my case smear it). Allow to set at room temperature or place in fridge for quicker results. 

All of these recipes last for about a week or two in the fridge. Longer in the freezer. All should be stored in an airtight container. Happy Creating!

Sources:


Wednesday, May 13, 2015

The Porch in Winter Park

The Porch in Winter Park
643 N Orange Ave, Orlando, FL 32801
Hours:
Mondays 4 pm to 2 am
Tuesday - Sunday 11:30 pm to 2 am

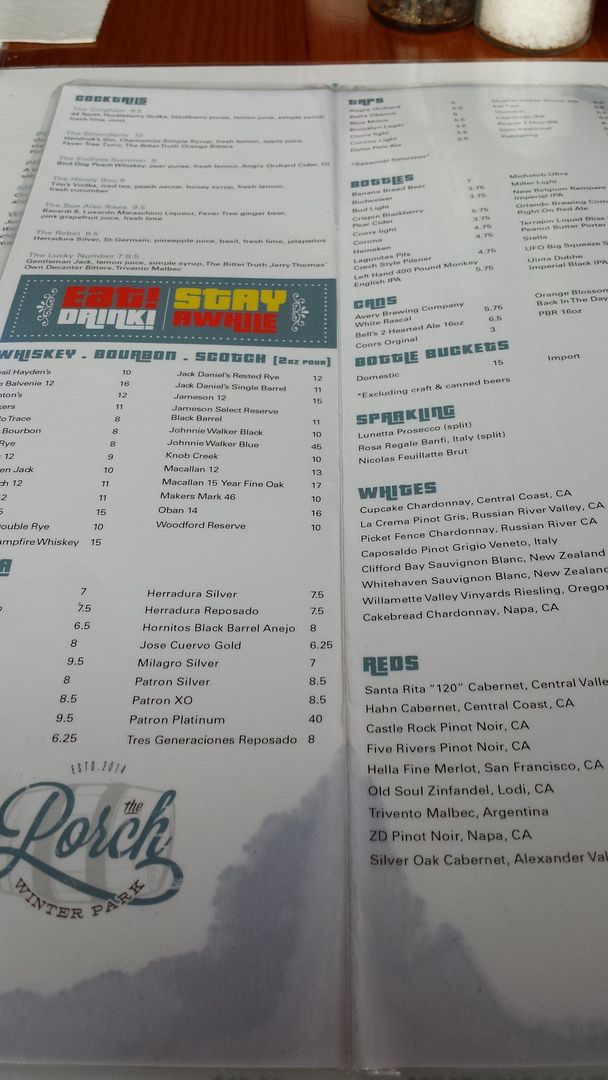
A few weeks ago I had the pleasure of dining at The Porch in Winter Park for lunch with a couple friends. I was psyched to try the place out after reading reviews about their unique menu online. The environment that The Porch offers is so comforting and country-home like. The outside patio is lighted at night by the over-head lights that are strung from side to side which I imagine looks so cute. One of the things I was really excited about was the diverse drink menu; each one of their cocktails are made with at least one unique ingredient.

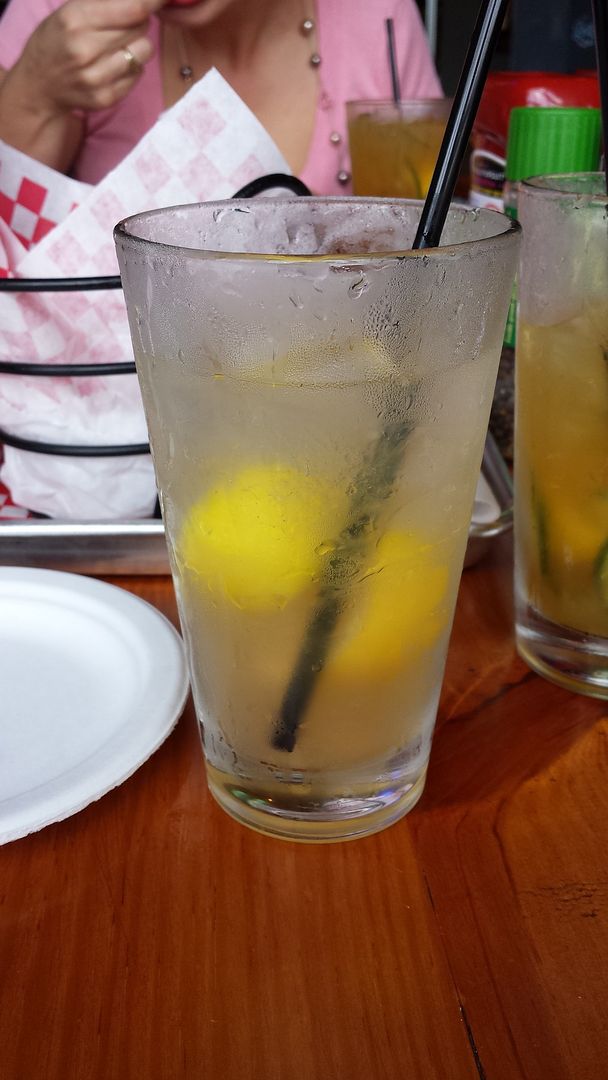
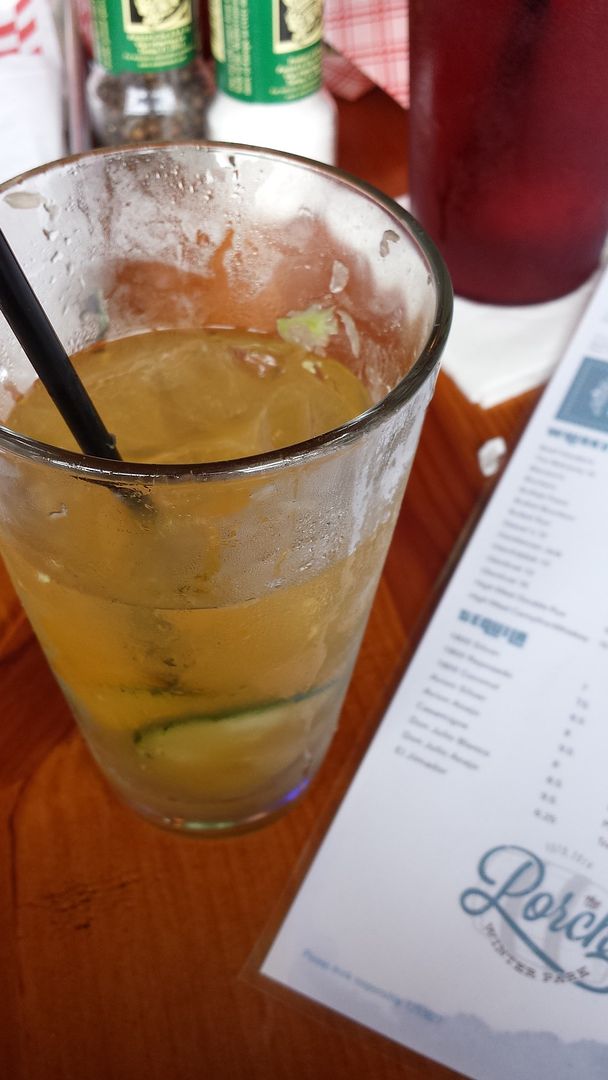
Two of us got "Honey Boo" and my other friend got "The Serendipity;" each drink was delicious and unique. The Honey Boo (pictured right) was a peach iced tea made with lemon and cucumber and Tito's vodka. It was very light and refreshing. The Serendipity (pictured left) was a spin on gin and tonic made with apple juice and chamomile syrup. I didn't personally like the flavor of this one and in comparison to my drink it was kind of syrupy but my friend said that it was good!
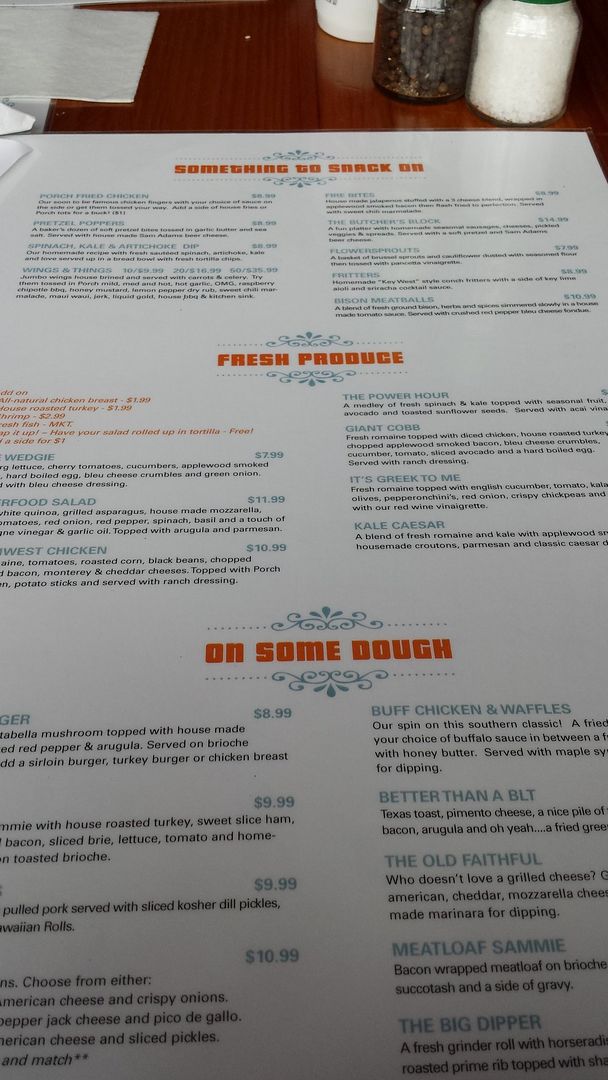
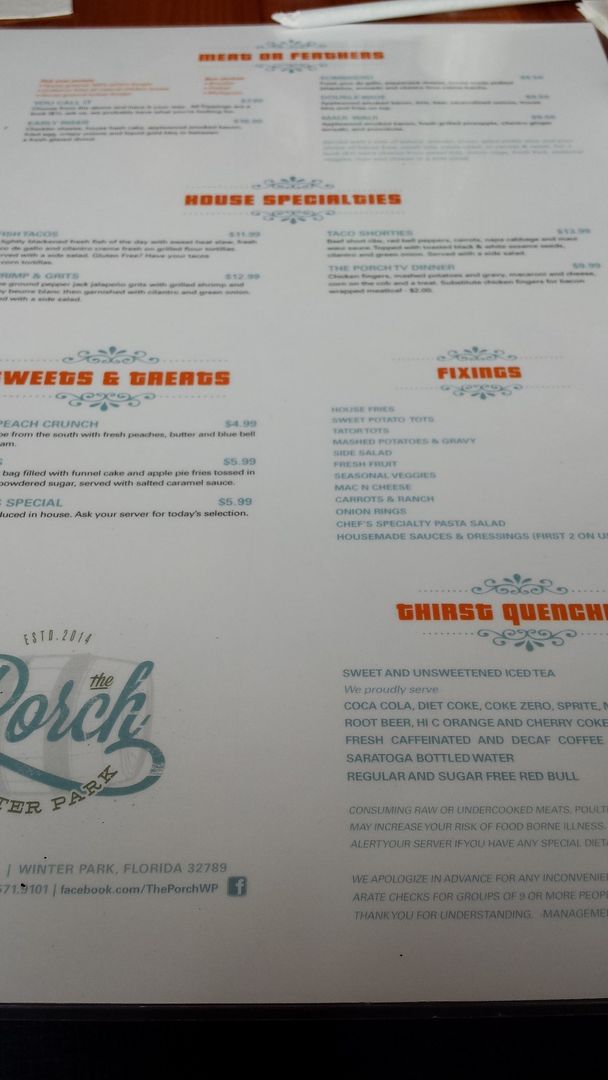
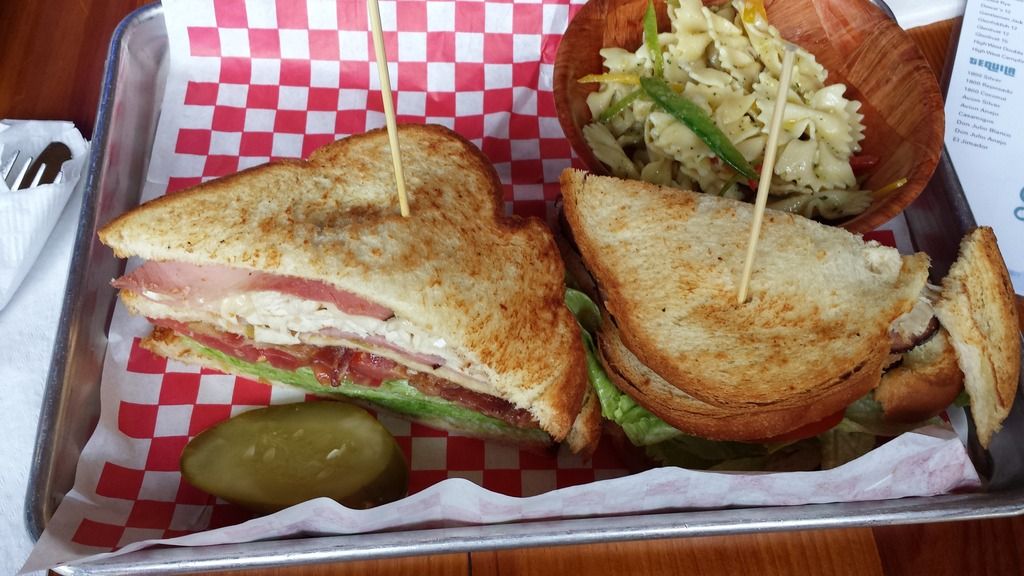
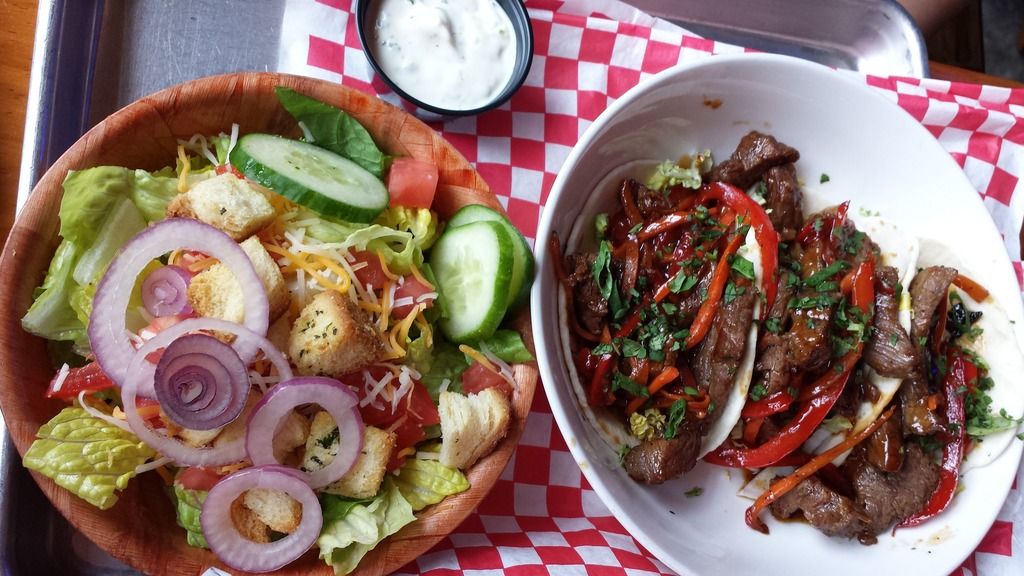
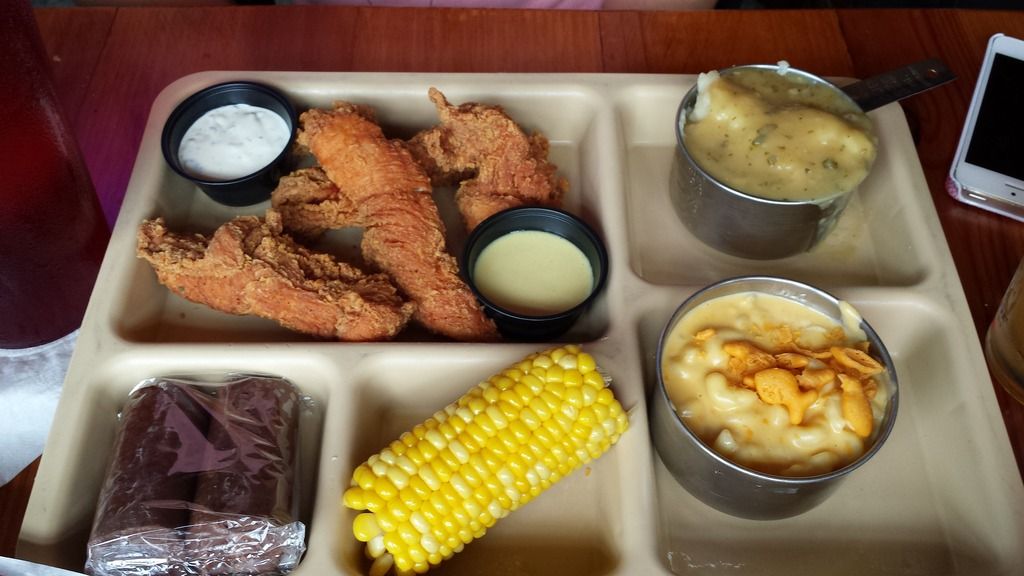
For the meal options there were almost too many good choices; I will definitely have to return a few more times to try everything that I was interested in. I chose The Club Brie, the other two got Taco Shorties and The Porch TV Dinner. The Club Brie was so delicious! I recently became fond of sandwiches made with Brie so this one stood out right away- I'm also not a huge fan of bacon but with everything else going on on this sandwich you could hardly taste it. The Taco Shorties were more Asian inspired than the Hispanic inspiration you would expect from tacos. They were made with braised short rib and green peppers, they were quite delectable. The TV Dinner brings so much food! You get chicken tenders, mashed potatoes with gravy, corn on the cob, mac and cheese, and a sweet treat. You could also substitute the chicken for meat loaf for two dollars more. This dish was particularly cute because it's served on a lunch tray and the sides are served in measuring cups!
The Club Brie
Taco Shorties
The Porch TV Dinner
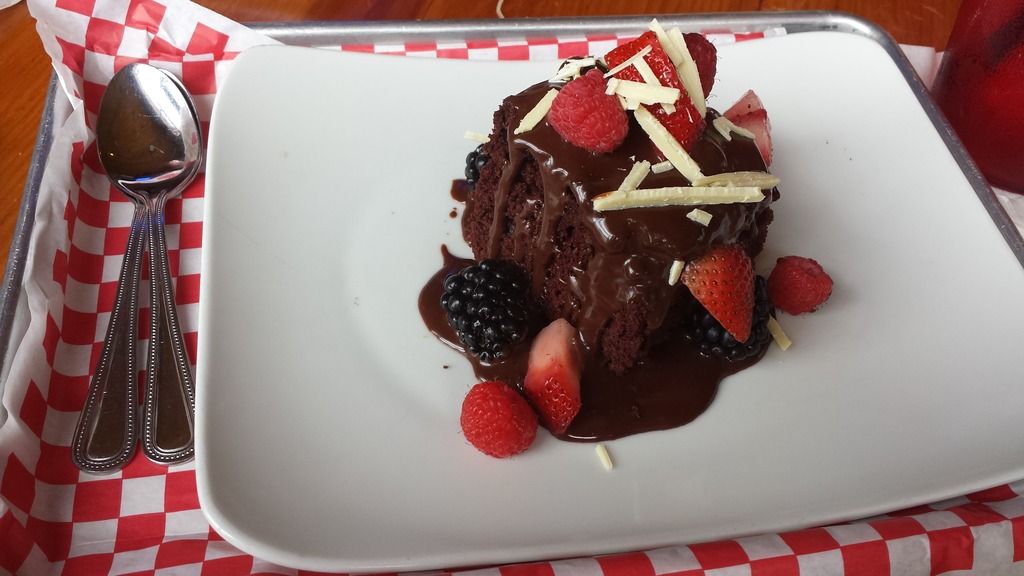
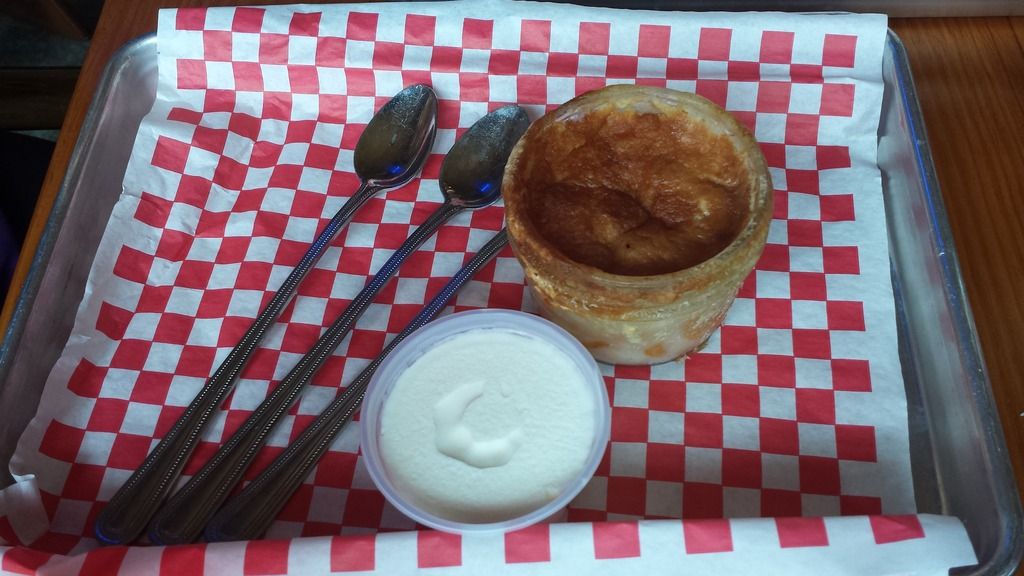
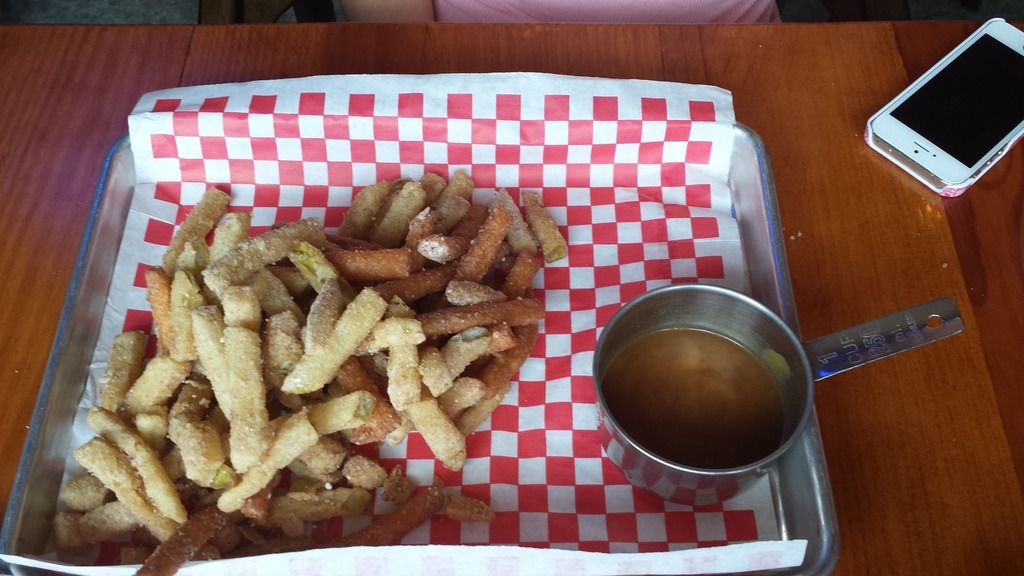
We also tried each of the dessert options that were available that day. Everyday they offer Mom's Peach Crunch and Fun Fries as well as a Chef's Special. The Mom's Peach Crunch is a cobbler served with a cute little cup of vanilla ice cream. The Fun Fries are a mixture of Apple Pie fries and Funnel Cake Fries tossed in cinnamon sugar and served with caramel sauce. The fries were okay, I think they could have used a little more flavor. The sauce that was served with the fries was served cold, I think it would have been much better served warm. I ordered the Chef's Special which that day was a Chocolate Cake served with berries. The cake was moist and the ganche was rich. The berries added a very nice flavor too.
Chef's Special
Mom's Peach Crunch
Fun Fries
All in all I believe that The Porch is a wonderful lunch option, they advertise a Bloody Mary Bar on Saturdays and a Bottomless Mimosa special on Sundays which would make them a wonderful brunch selection. I will definitely be returning and I encourage you to try them out as well, you won't be disappointed!

Wednesday, April 22, 2015

Budget Friendly Bridal Shower

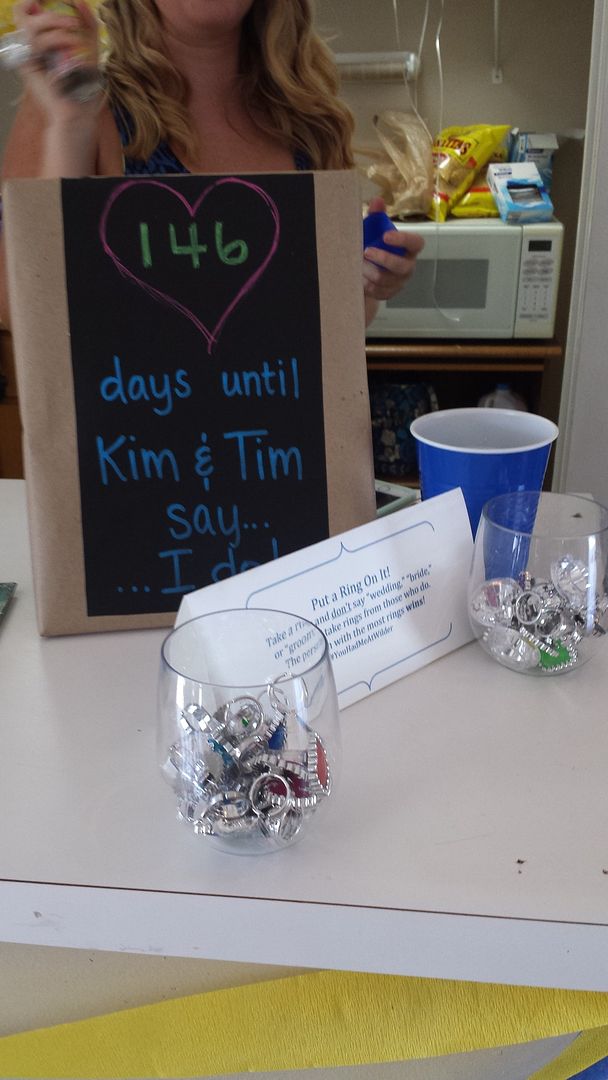
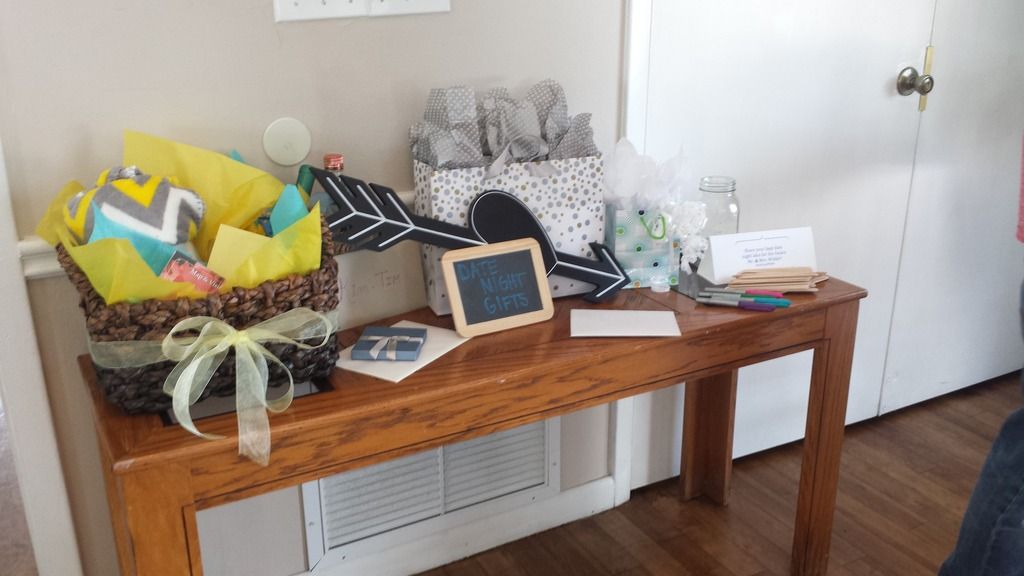
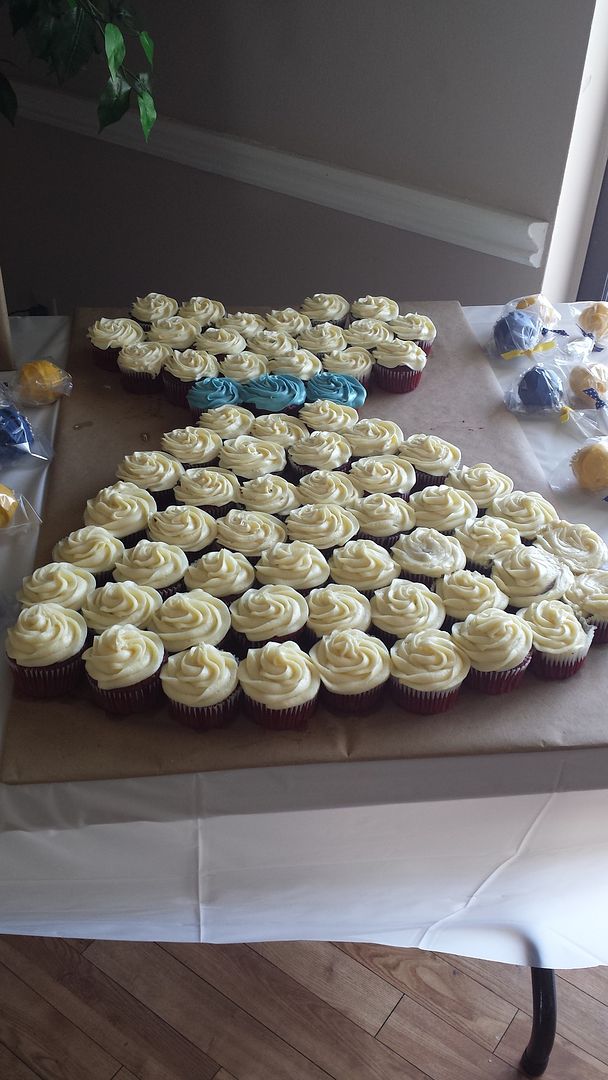
No matter how you swing it, entertaining for over twenty people can get expensive. So with that being said it's always good for everyone involved to keep the prices to a minimum. My best friend had no idea that we were throwing her a bridal shower, so this added to the excitement of it all! The theme of our shower was "date night" and all of the guests were encouraged to bring them a gift they could use for a date together rather than your normal home goods. We wanted to keep it as low cost as possible so we opted to make everything ourselves which meant baking cupcakes, making sangria, making food, and making the decorations. Somehow we managed to pull it off, quite successfully might I add.

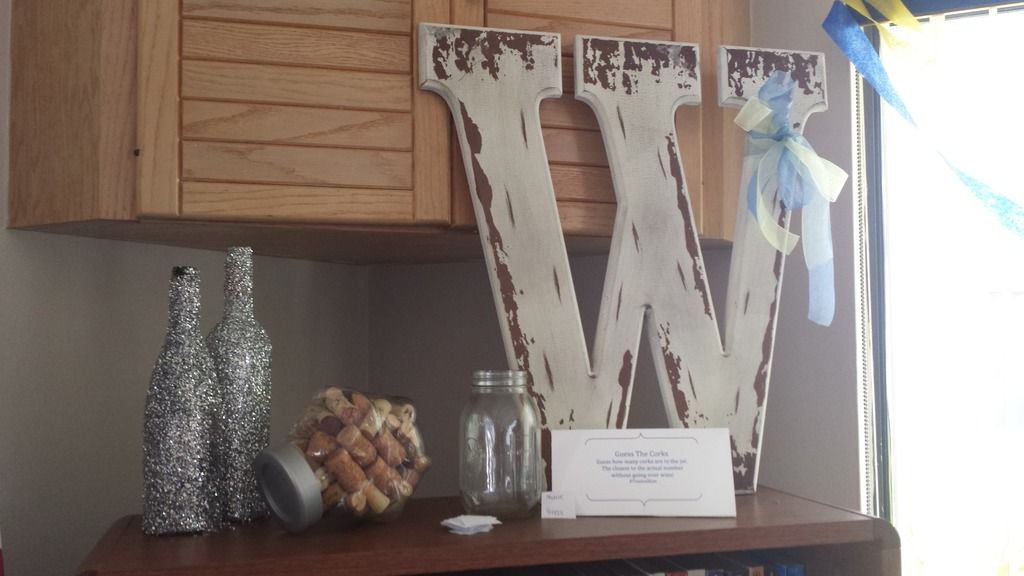
We did your basic shower games: toilet paper wedding dresses, you can't say "wedding," "bride," or "groom;" but we also added in a few new games. We played one game where we had the bride leave the room for a few minutes and the guests quickly wrote down all of the details they could remember about what she was wearing and what her hair looked like; the results were fun to read considering how wrong some people were! Another game we played was trying to have the guests guess various quotes from romantic movies. I made the mistake of choosing movies that everyone isn't too familiar with and not everyone could answer more than two or three of them! We opted for a handicap and allowed people to look on their phones for a minute. The other game we played was a "guess the corks" game where the guests just had to guess how many corks were in a jar and the person who was closest won a prize.
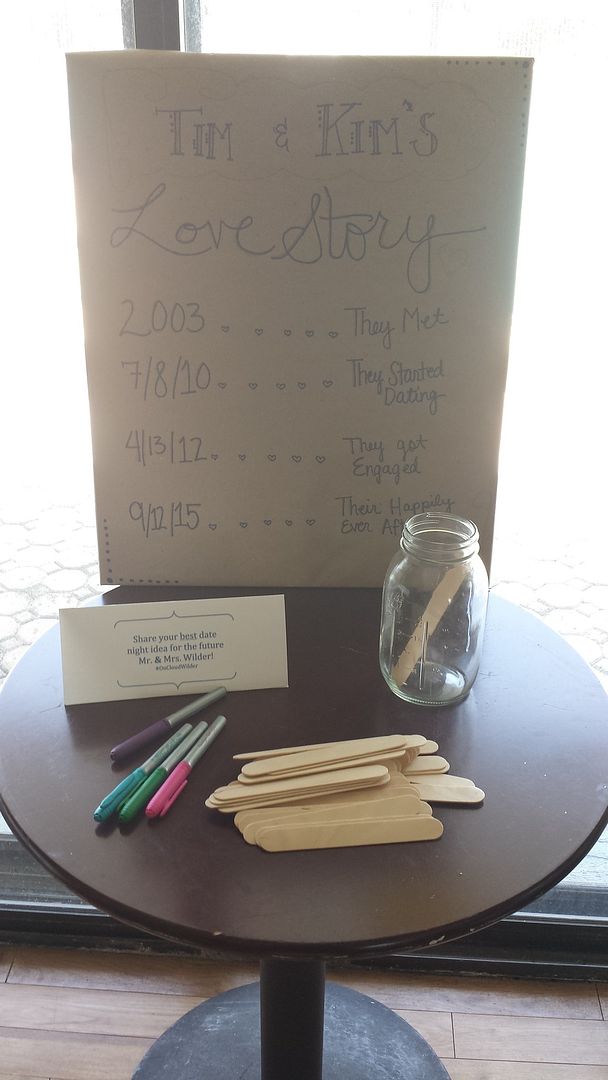
There were a few things we did that didn't involve any prizes but were still fun and enjoyable. We had a few different kinds of Mad Libs around on the tables for the guests to fill out, the bride and groom read them together and had a few laughs over some of the creations. We also played a Newlywed Game with the bride and groom. It was fun to see how much they actually know about each other! I think out of fifteen or so questions they only missed one or two (some of our questions were hard too!) The final game we played was the shoe game. We sat the bride and groom back to back and asked them various opinion based questions. They each had one of their shoes in one hand as well as the other's shoe in the other hand. Whenever we asked them a question (i.e. "who is the better driver?") they raised the shoe of whoever they thought was the answer. This game was funny because they don't know what the other is saying and they reveal their true opinions on things like who cooks better or does more chores around the house. There was also a jar and pop-sickle sticks for guests to write down their favorite date night idea for the couple to do.
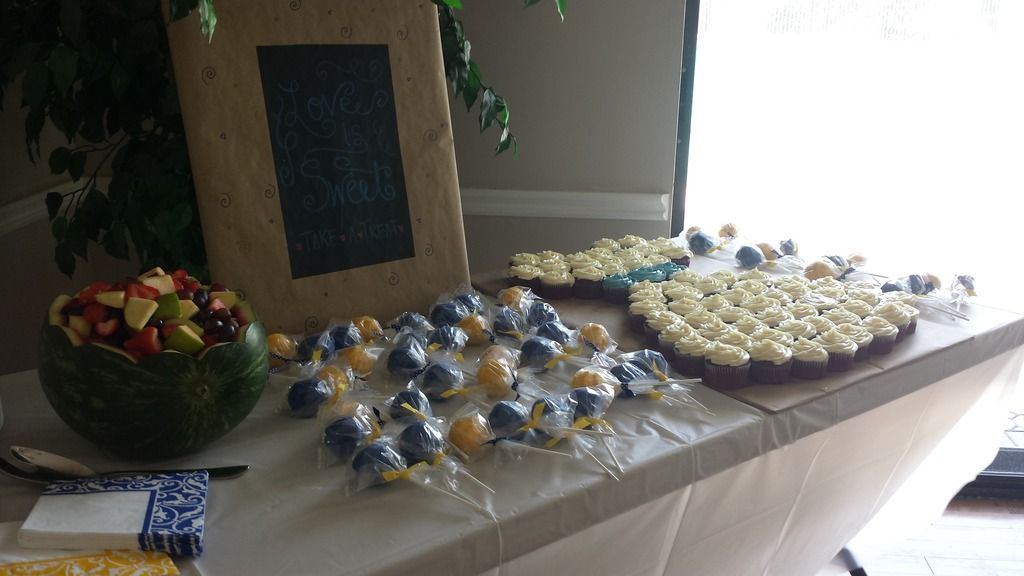
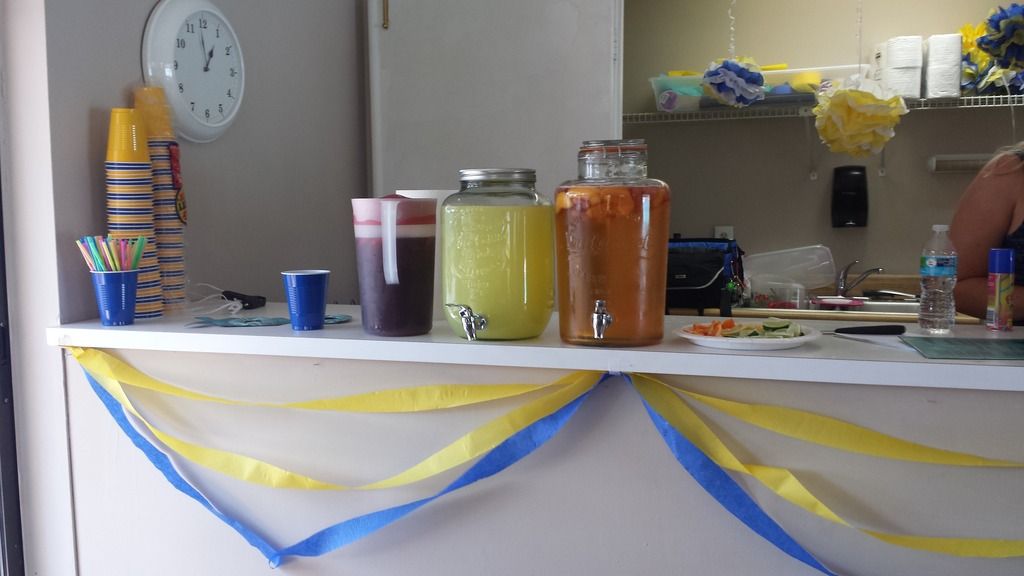
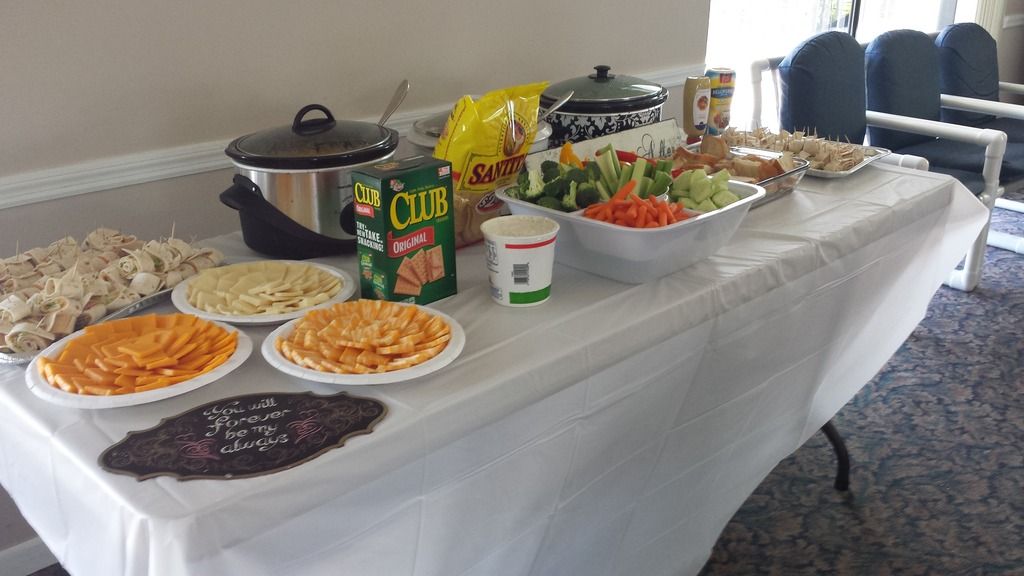
All of the food at the shower was made from scratch. We had your usual veggie tray with ranch dip and fruit tray with fluff dip (equal parts cream cheese and fluff mixed together). We also had queso made with Velveeta and Rotel tomatoes and spinach dip, both kept warm in crockpots. We made meatballs in the crockpot as well using a recipe that called for grape jelly and chili sauce! The main part of our food table was our assortment of pinwheels: turkey & cheese, ham & cheese, and buffalo chicken. The wraps were simple and easy to make and such a great hit! For drinks we had soda, water, lemonade, beer and sangria. We made two different kinds of sangria: a basic red and my favorite, Strawberry Peach.


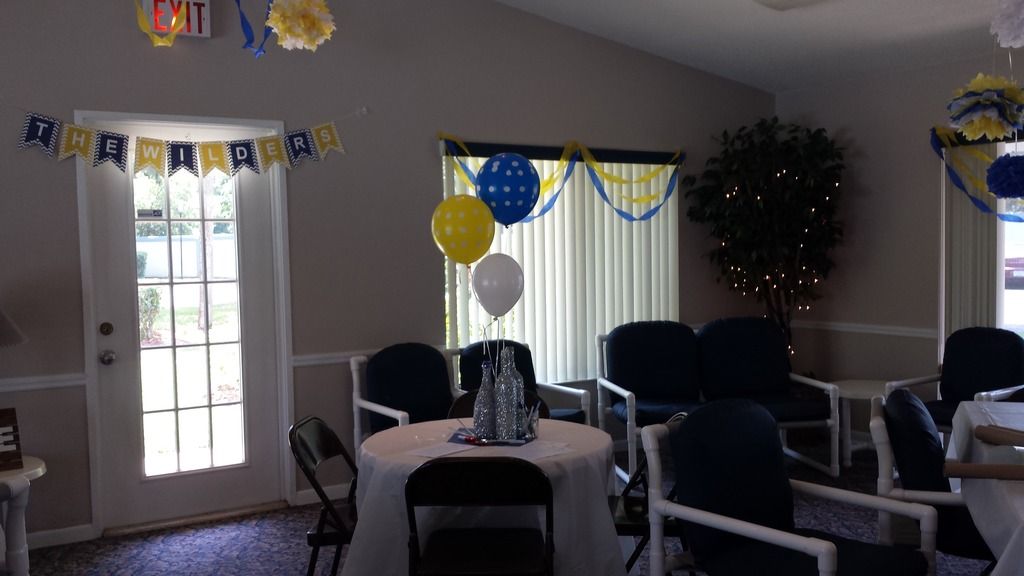
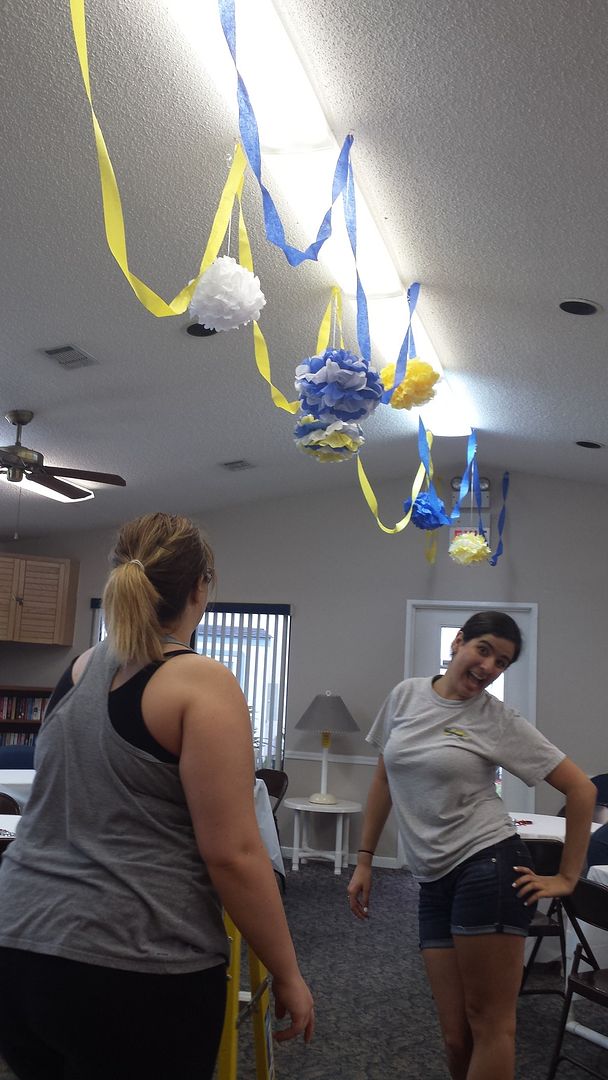
For decorations we used the basic paper streamers, balloons, and homemade pom-poms. The pom-poms were really simple to make and didn't take long when we had four people working on them. I also found a free downloadable banner template using Chicfetti; it was absolutely perfect and matched the decor wonderfully! We made the cupcake dress almost from our imaginations. We had seen a picture of one on Pinterest but that's all, there wasn't a link that followed it and by the time we realized this we were elbows deep in icing and there was no turning back; needless to say we did a pretty damn good job on that one. For the centerpieces on the tables we glittered wine bottles to arrange on the tables and give the room a girlier touch. 

All in all I think this bridal shower was a wonderful success and relatively reasonable in price. If you have any tips or tricks you know of feel free to comment below! I would also love to hear how you would change anything we did! 

Sources:

Tuesday, March 17, 2015

Irish Car Bomb Cupcakes

This something I have been seeing everywhere for quite some time now. Whether it was my mom sending me things on Pinterest or things popping up on feeds due to my regularity posting similar items, it's been a common flavor these past few months and it's also been something I have no issue experimenting with. About a month ago I came across a recipe for Chocolate Stout Pie and thought this would be great and Ricky would love it because I would be incorporating his favorite beer! I was wrong. While it was great and I loved it, Ricky did not. He said the flavor was too rich (he apparently hates dark chocolate... I didn't think it was dark at all!) and the whipped cream tasted too much like alcohol; I made a Bailey's Irish Whipped Cream to put on top which I thought was great. We ended up giving the pie to friends who enjoyed it and only gave compliments. 
Alas here I am, with the dreams of Irish Car Bomb Cupcakes on a day none other than St. Patrick's Day. How fitting. I know exactly how I want my cupcakes to be: Guinness Draught (not Stout, we're going for a theme here) chocolate cake, cored with Jameson Irish Whiskey ganache, and topped with a Bailey's Irish Cream Cheese frosting. I gathered a few recipes found on various blogs via Pinterest and took from them what I liked. 


Guinness Draught Cake
1 C. Guinness Draught
1 C. unsalted butter
3/4 C. unsweetened cocoa powder
2 C. all-purpose flour
2 C. sugar
1-1/2 TSP. baking soda
3/4 TSP. salt
2 large eggs
2/3 C. sour cream


Preheat oven to 350°F. Line cupcake pans with liners. Set aside.
Bring beer and butter to a simmer in a heavy saucepan over medium heat. Add cocoa powder and whisk until mixture is smooth. Cool slightly.
Whisk flour, sugar, baking soda, and salt in large bowl to blend. In a large bowl beat the eggs and sour cream until combined. Add the chocolate mixture to sour cream mixture and beat just to combine. Add the flour mixture and beat briefly on low speed. Using a rubber spatula, fold batter until completely combined. Divide batter among cupcake liners, filling them half of the way. Bake for about 20 minutes or until toothpick comes out clean. Let cool in the pans for 5 minutes, then transfer to racks to cool completely.
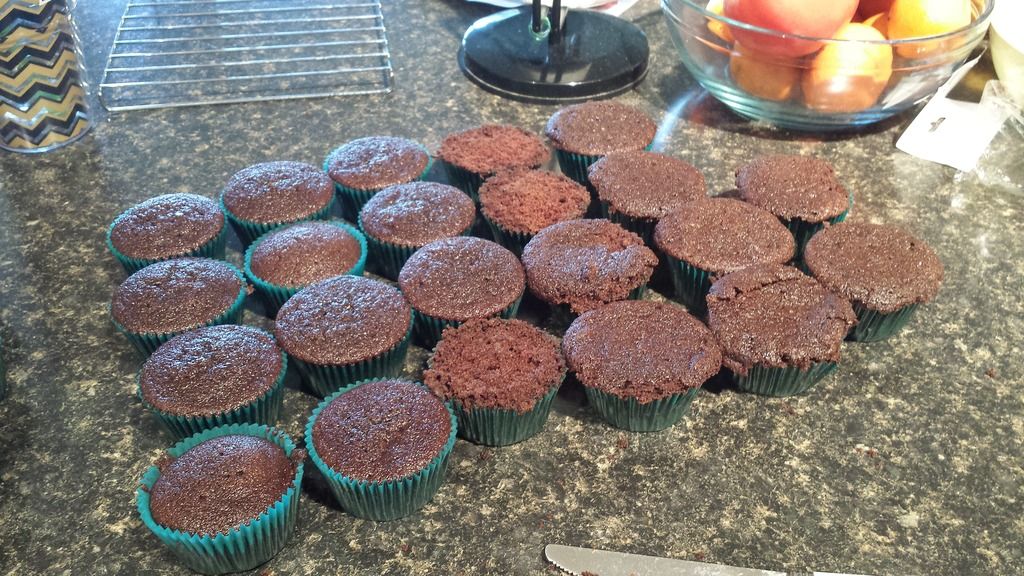
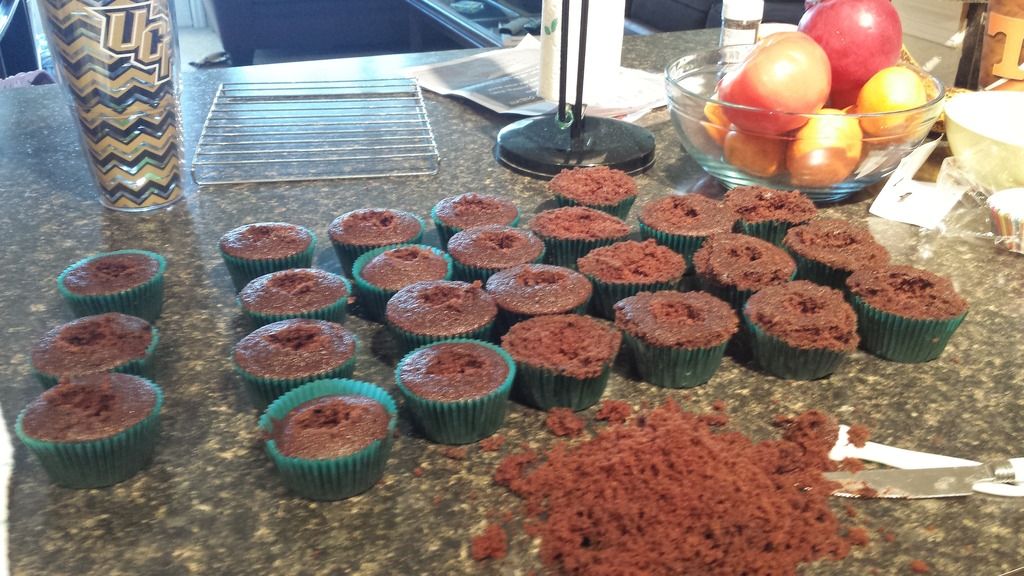
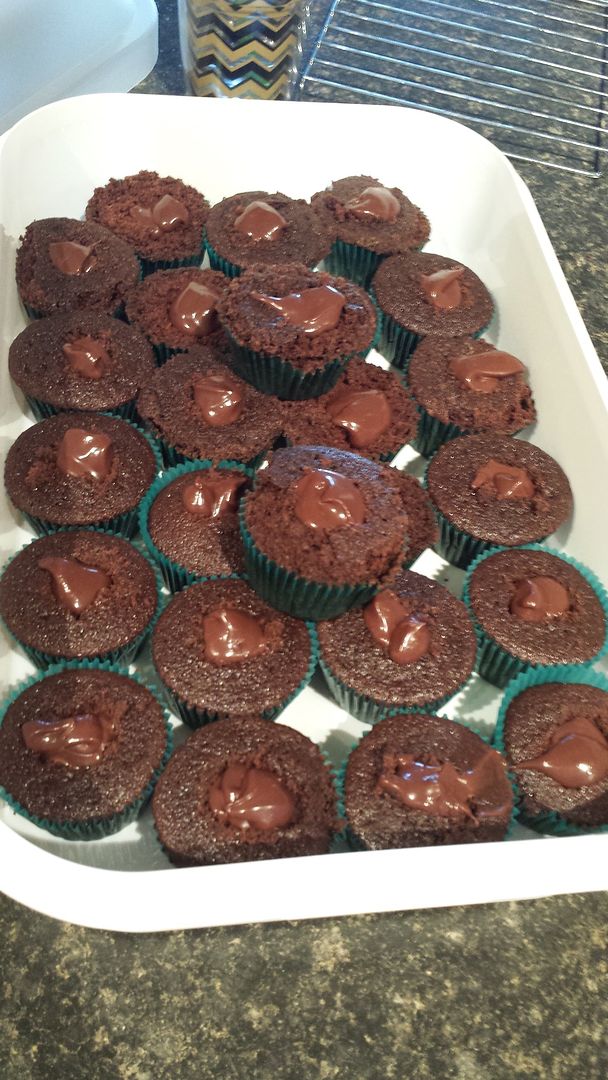
I modified the original instructions slightly. The original recipe called for you to fill the liners 2/3 of the way, but after doing this I found that the cupcakes overflowed making them "ugly," so I resulted in filling the rest half way. The other thing I modified was the baking time. After the suggested 17 minutes the cakes were still a little wet in the center so I added on the three minutes and it worked great. One very important step here though is that you leave the cupcakes in the pan for at least five minutes. I didn't do this with the first batch, I was too anxious. When I was trimming and coring them I regretted it. Not allowing for them to cool before handling them made them crumbly and mushy. Below are pictures of the cupcakes after they've baked and had been cored. The ones on the left are the ones I allowed to cool and filled half-way. The ones on the right are the first batch that I didn't allow to cool and filled too much. 


To core the cupcakes I used a knife to cut a hole and carefully scoop out the inside. It wasn't ideal but it did the job. 

Jameson Ganache
4 oz. semi-sweet chocolate finely chopped
2 to 3 oz. milk chocolate finely chopped
3 TBSP. unsalted butter
2/3 C. heavy cream
3 TBSP. powered sugar
3 TBSP. Jameson Irish Whiskey

Heat the cream in a saucepan, not to boiling but long enough to make it hot. Place the chopped chocolates in a bowl along with the butter. Add the hot cream to the butter and chocolate and whisk together until smooth. Add the powered sugar and combine. Add the whiskey and stir to combine. Set aside to let cool. Mixture should firm up after 15 minutes. 
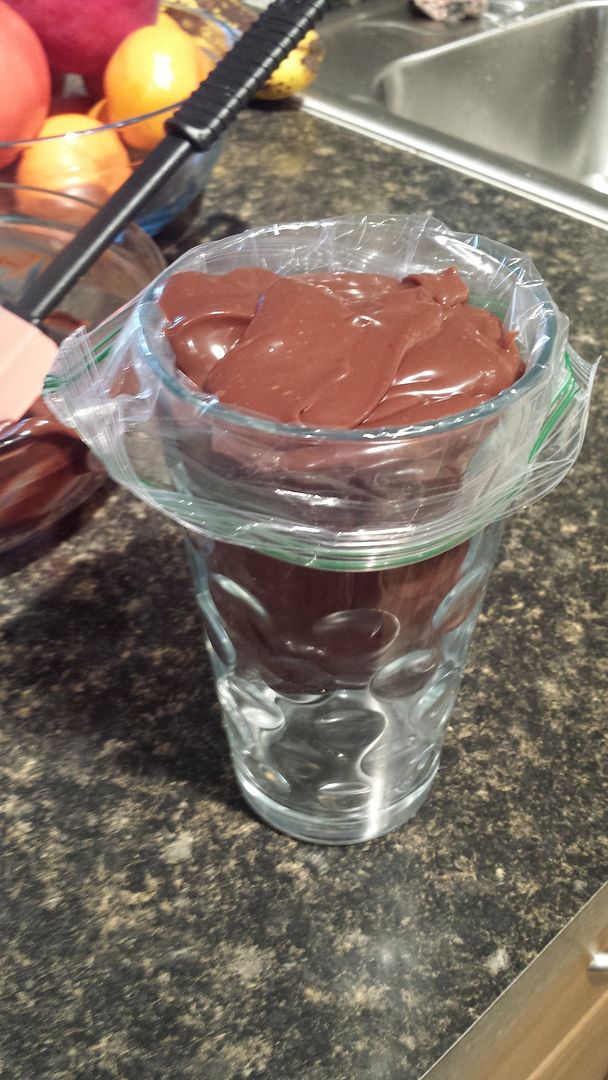
When I filled the cupcakes with the ganache I had to use a ziploc bag due to having misplaced my piping bags. I placed the bag into a glass and then filled it with ganache and then cut off a small corner of the bag. Below are pictures of the ganache in the bag as well as the filled cupcakes. 

Bailey's Irish Cream Cheese Frosting 
1/2 C. unsalted butter
4 C. powdered sugar
8 oz. cream cheese softened
4 TBSP. Bailey's Irish Creme

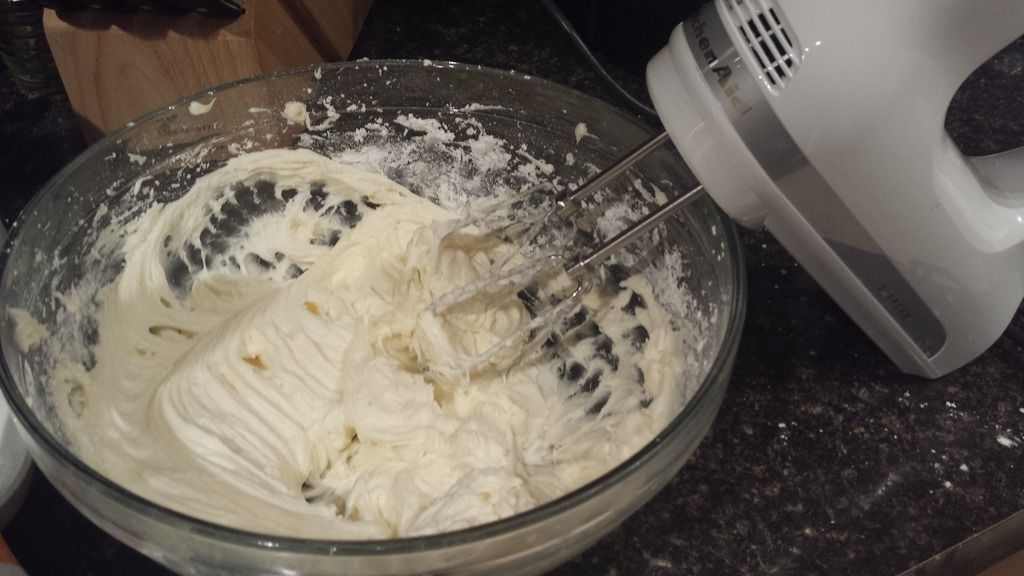
Cream together the butter and cream cheese and then gradually add the powdered sugar. Once the mixture is completely combined add in the Bailey's. This part is really only to your liking but I wouldn't add more than four tablespoons, it will taste too strong. The original recipe only called for four ounces of cream cheese but I didn't think it tasted enough like cream cheese frosting so I doubled it and am very much pleased with the results. 

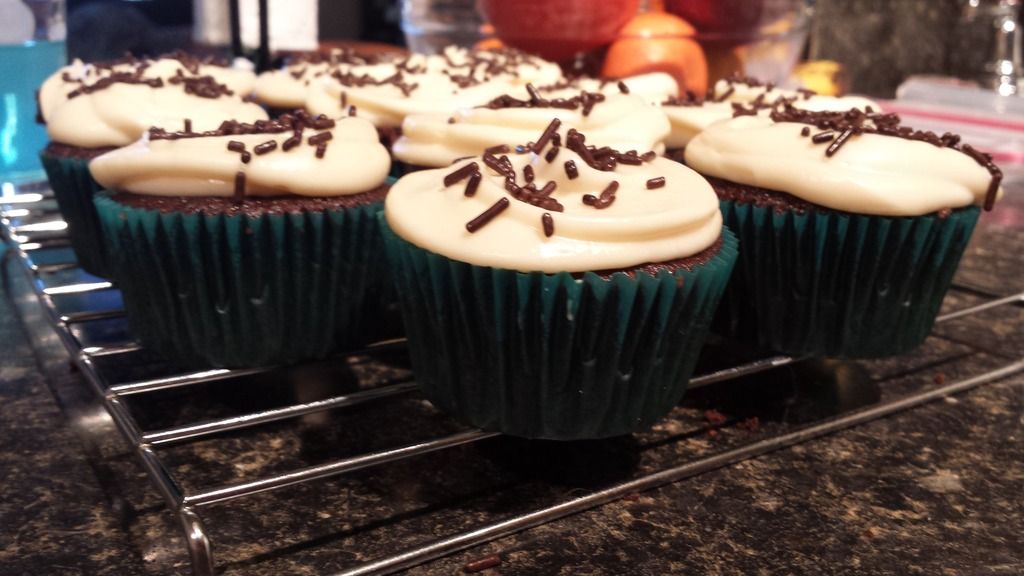
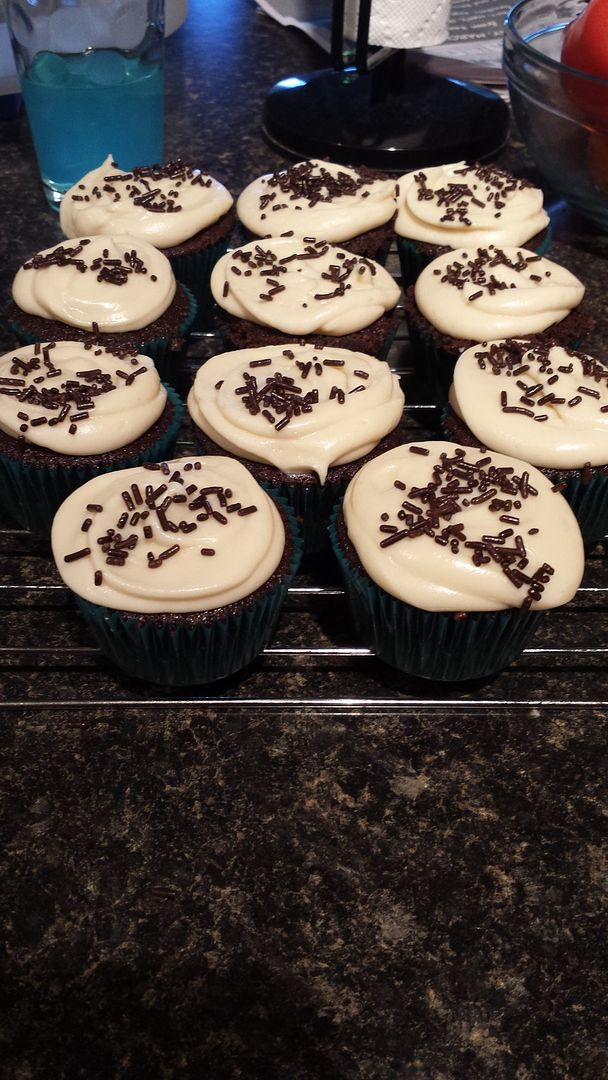
I iced the cupcakes with the same ziploc bag method, this disappointed me because I planned on being fancy but considering my method it didn't turn out too bad. I garnished them with chocolate sprinkles. Ricky didn't seem to like them too much but I'm learning he's hard to please with the different types of things. He said it was again, too rich. I think they're great! Definitely worth a try. 

Sources: